Manipulate the Tree Elements

    A decision tree tool must let you edit the tree freely. You may need to cut, copy, and paste nodes, copy a subtree, replace one node with another subtree, insert a decision or chance node between two connected nodes, or delete part of the model. Decision Tree Pro supports these common editing operations.

    Decision Tree Pro supports the following tree manipulations:

    1. Vertical position arrangement
    2. Convert to decision node or chance node
    3. Cut, copy, and paste a node
    4. Replace a node with a copied node or subtree
    5. Delete a node or children
    6. Insert a node

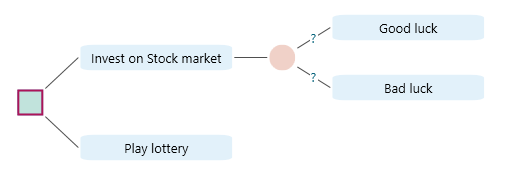
    Vertical Position Arrangement

    Suppose you have created a tree like this.

    Sample investment decision tree (Invest on Stock market versus Play lottery with Good luck and Bad luck events) used as the starting point for rearrangement examples.
    Sample investment decision tree (Invest on Stock market versus Play lottery with Good luck and Bad luck events) used as the starting point for rearrangement examples.

    To rearrange the vertical position of options, drag a node up or down.

    Action node being dragged upward to rearrange its vertical position among sibling options on the canvas.
    Action node being dragged upward to rearrange its vertical position among sibling options on the canvas.

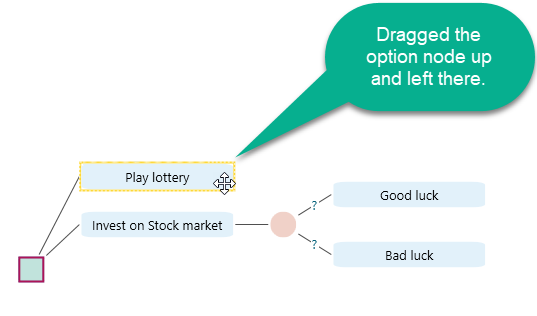
    After you release the mouse, the tree is rearranged.

    Tree after releasing the dragged node, showing the sibling options in their new vertical order.
    Tree after releasing the dragged node, showing the sibling options in their new vertical order.

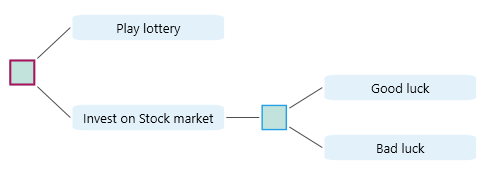
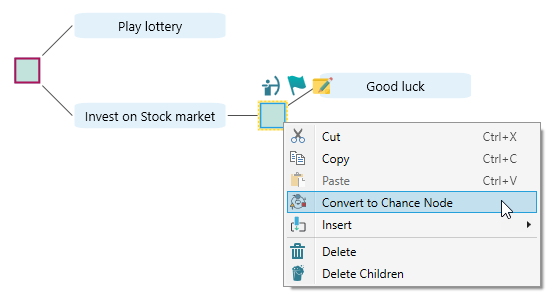
    Convert to Decision Node or Chance Node

    Select a chance node and right-click it to open the context menu. You will see the option "Convert to Decision Node".

    Right-click context menu on a Chance node with the Convert to Decision Node option visible.
    Right-click context menu on a Chance node with the Convert to Decision Node option visible.

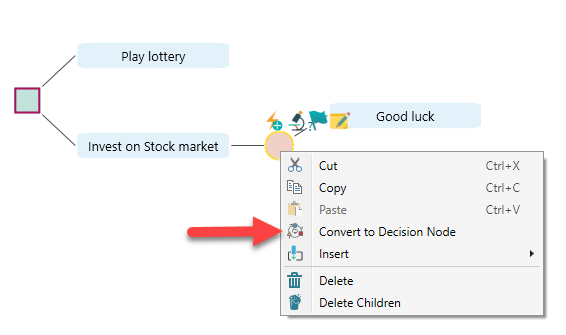
    After you choose that menu item, the chance node is converted to a decision node.

    Same node after conversion: the Chance node is now drawn as a Decision node (square) with its children preserved.
    Same node after conversion: the Chance node is now drawn as a Decision node (square) with its children preserved.

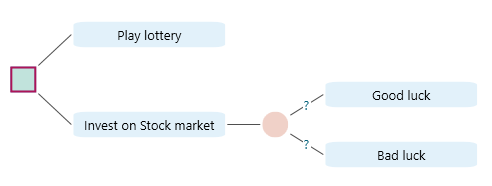
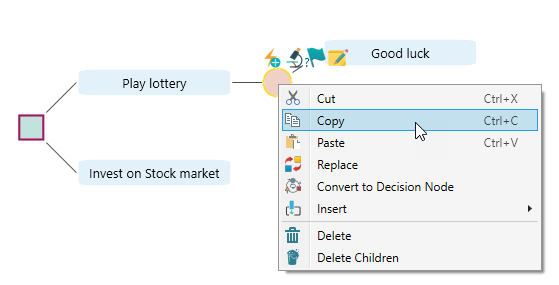
    You can also convert a decision node to a chance node. Select the decision node, right-click it, and choose "Convert to Chance Node".

    Right-click context menu on a Decision node showing the reverse Convert to Chance Node option.
    Right-click context menu on a Decision node showing the reverse Convert to Chance Node option.

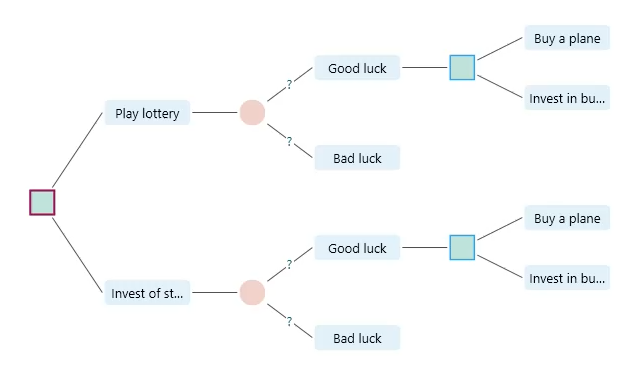
    Cut, Copy, and Paste a Node

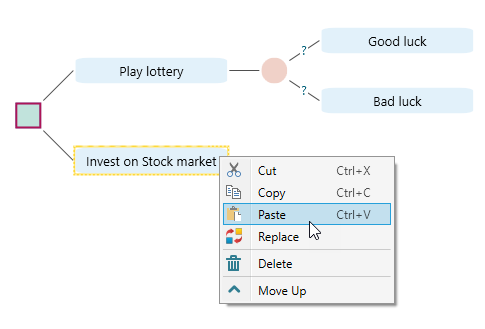
    Select a node and use the context menu, or press Ctrl+C, to copy it. For example, start with the tree below.

    Investment decision tree used as the starting example for cut, copy, and paste node operations.
    Investment decision tree used as the starting example for cut, copy, and paste node operations.

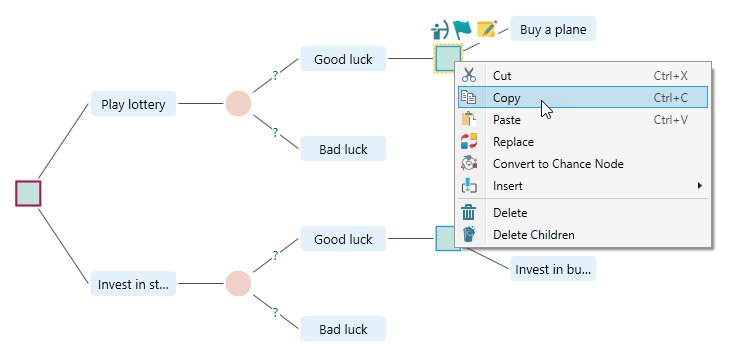
    Select the chance node and choose Copy from the context menu.

    Selecting a Chance node and choosing Copy from its right-click context menu, equivalent to Ctrl plus C.
    Selecting a Chance node and choosing Copy from its right-click context menu, equivalent to Ctrl plus C.

    Now select the option node "Invest in the stock market" and paste the copied node.

    Right-click context menu on the Invest on Stock market action node with the Paste option highlighted.
    Right-click context menu on the Invest on Stock market action node with the Paste option highlighted.

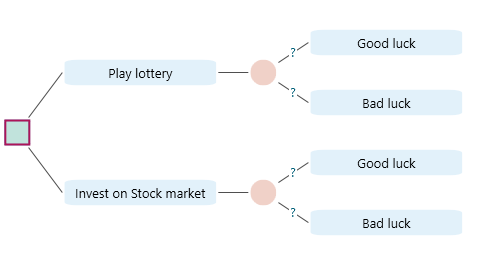
    After pasting, the tree looks like this.

    Tree after pasting the copied Chance subtree onto the Invest on Stock market action node.
    Tree after pasting the copied Chance subtree onto the Invest on Stock market action node.

    You can also cut a node or subtree and paste it over another node.

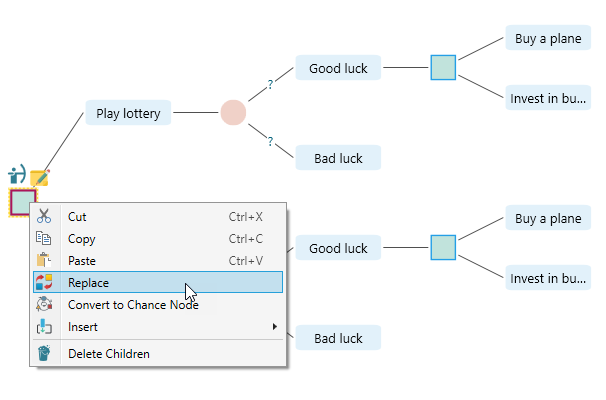
    Replace a Node with a Copied Node or Subtree

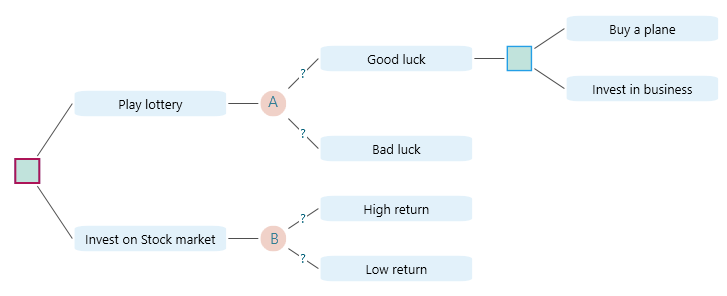
    You can copy a node and replace another node with that copied node and its subtree. Consider the following tree.

    Sample tree with nodes A and B used to demonstrate the Replace operation that swaps a node with a copied subtree.
    Sample tree with nodes A and B used to demonstrate the Replace operation that swaps a node with a copied subtree.

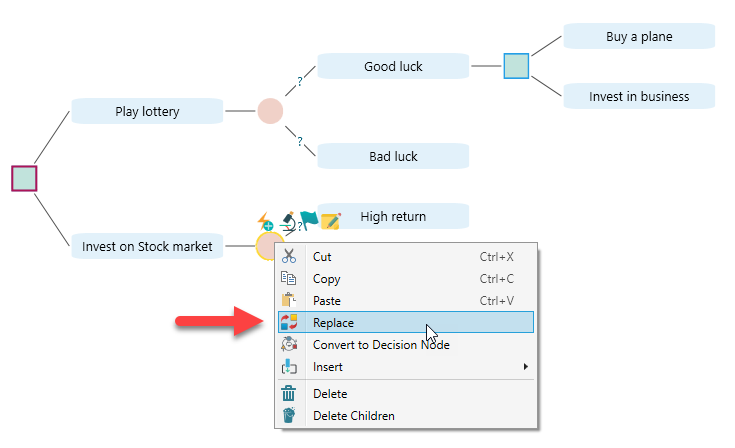
    Suppose you want to replace node B with node A. Copy node A, select node B, and choose "Replace" from the context menu.

    Right-click context menu on node B with the Replace option chosen to swap it with the previously copied node A.
    Right-click context menu on node B with the Replace option chosen to swap it with the previously copied node A.

    After replacement, the tree looks like this.

    Tree after Replace: node B and its subtree have been overwritten by node A and its subtree.
    Tree after Replace: node B and its subtree have been overwritten by node A and its subtree.

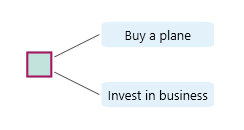
    You can even replace the root node with a copied node. For example, suppose you copied a decision node that has "Buy a plane" and "Invest in business" as children. Select the root node and replace it.

    Copying a decision node whose children are Buy a plane and Invest in business, in preparation for replacing the root.
    Copying a decision node whose children are Buy a plane and Invest in business, in preparation for replacing the root.

    Select the root node, right-click it, and choose "Replace".

    Right-click context menu on the root node with Replace chosen, used to swap the root with the previously copied subtree.
    Right-click context menu on the root node with Replace chosen, used to swap the root with the previously copied subtree.

    After clicking "Replace", the tree becomes this.

    Tree after the root node has been replaced by the copied Buy a plane versus Invest in business subtree.
    Tree after the root node has been replaced by the copied Buy a plane versus Invest in business subtree.

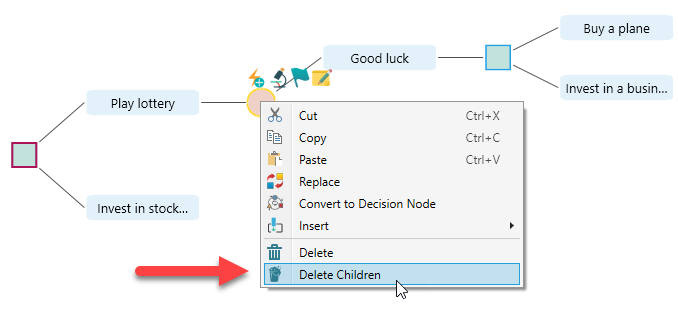
    Delete a Node or Delete Children

    The context menu for a node includes Delete. You can also press the Delete key to delete the selected node.

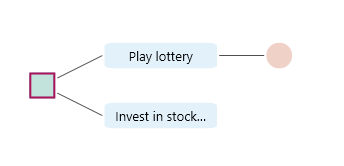
    If the selected node has children, you can choose "Delete Children" to remove only its child nodes.

    Right-click context menu on a node with the Delete Children option highlighted to remove all descendants while keeping the node itself.
    Right-click context menu on a node with the Delete Children option highlighted to remove all descendants while keeping the node itself.

    After choosing this option, the tree becomes this.
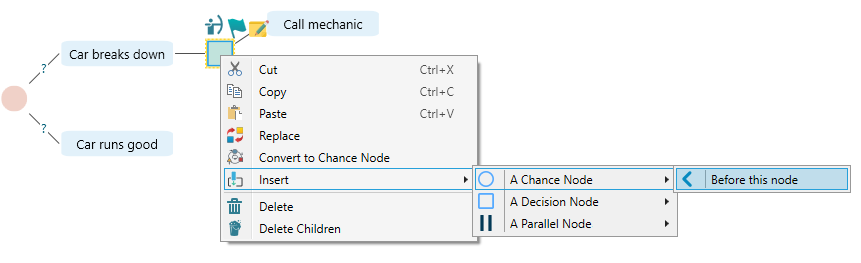
    Tree after Delete Children: the selected node remains while all its descendant nodes have been removed.
    Tree after Delete Children: the selected node remains while all its descendant nodes have been removed.

    Insert a Node

    Sometimes you realize that another decision or uncertainty belongs between two existing nodes. The Insert feature lets you add a decision node, chance node, or parallel node between connected nodes.

    Suppose you have a tree like this.

    Sample journey planning decision tree (car versus plane with a Car breaks down event) used to demonstrate inserting nodes between existing ones.
    Sample journey planning decision tree (car versus plane with a Car breaks down event) used to demonstrate inserting nodes between existing ones.

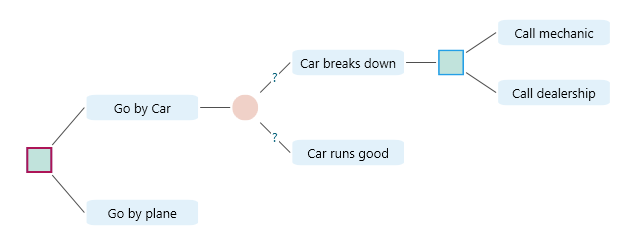
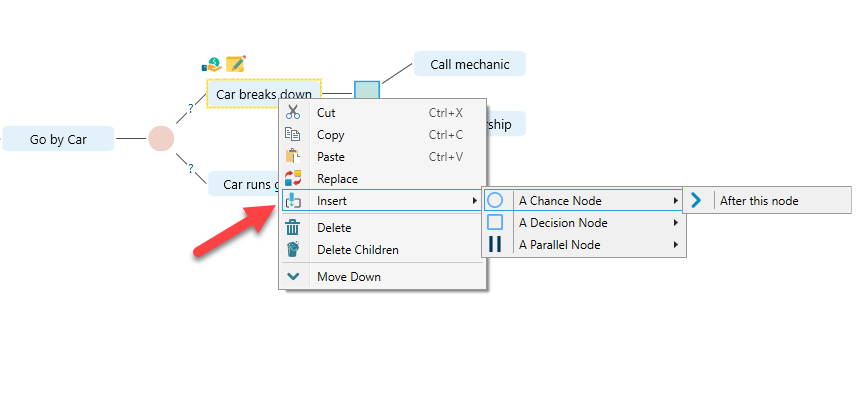
    Now suppose you realize that when the car breaks down, there are two uncertain scenarios: "Cell phone has network" and "No cell phone network". You can call a mechanic or dealership only if the cell phone has a network signal. To insert a chance node after "Car breaks down", select that node and right-click to open the context menu.

    Right-click context menu on the Car breaks down event with Insert, A Chance Node, After this node sub-menu open to add a chance between this node and its child.
    Right-click context menu on the Car breaks down event with Insert, A Chance Node, After this node sub-menu open to add a chance between this node and its child.

    You can also insert a node by selecting a decision node, as shown below.

    Inserting a Chance node from the context menu of a Decision node so the new chance sits above the selected node in the tree.
    Inserting a Chance node from the context menu of a Decision node so the new chance sits above the selected node in the tree.

    Last updated on Feb 16, 2020