Getting Started
Getting Started with the Decision Matrix
A decision matrix is a simple way to compare your choices side by side. You list what matters to you (your objectives), you list the options you are weighing, and then you score each option on each objective. The option with the best overall score is the one that fits your goals the closest.
Rational Will lets you describe each objective in a way that matches the real world. You start by stating a goal, then you pick the type of objective. It can be a yes or no answer (Boolean), a judgment call you score yourself (Subjective), a plain number, and more. When you pick a number type, Rational Will lets you shape a utility function, so you can say how much each amount is actually worth to you. More is not always twice as good. When you pick a money type, you get the utility function plus an interest rate, and the software can work out the net present value for you.
The easiest way to understand all of this is with a real example. Say you have three candidates for a job and you want to hire one of them based on a few things you care about. By the end you will have a clear score for each person and a chart that shows why.
Here are the objectives we will use:
- Maximize years of experience
- Must have a good reference
- Maximize communication skills (a score you give from the interview)
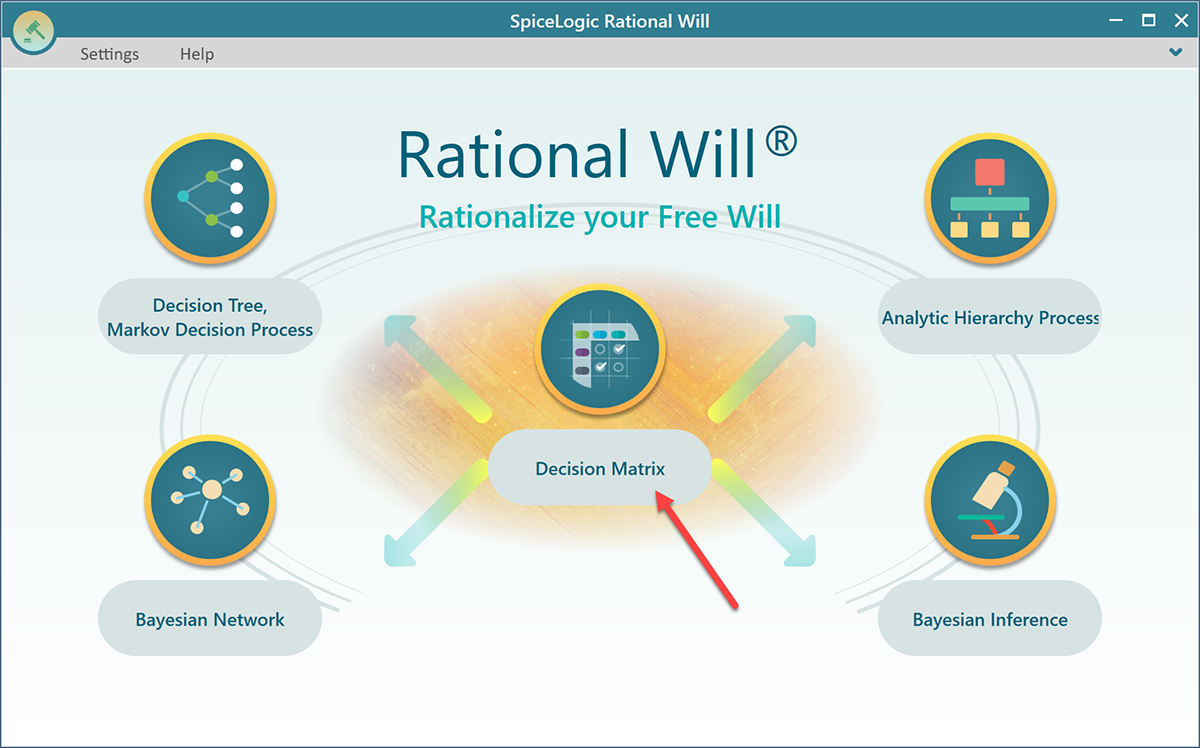
Start Rational Will and click the "Decision Matrix" button on the home screen.
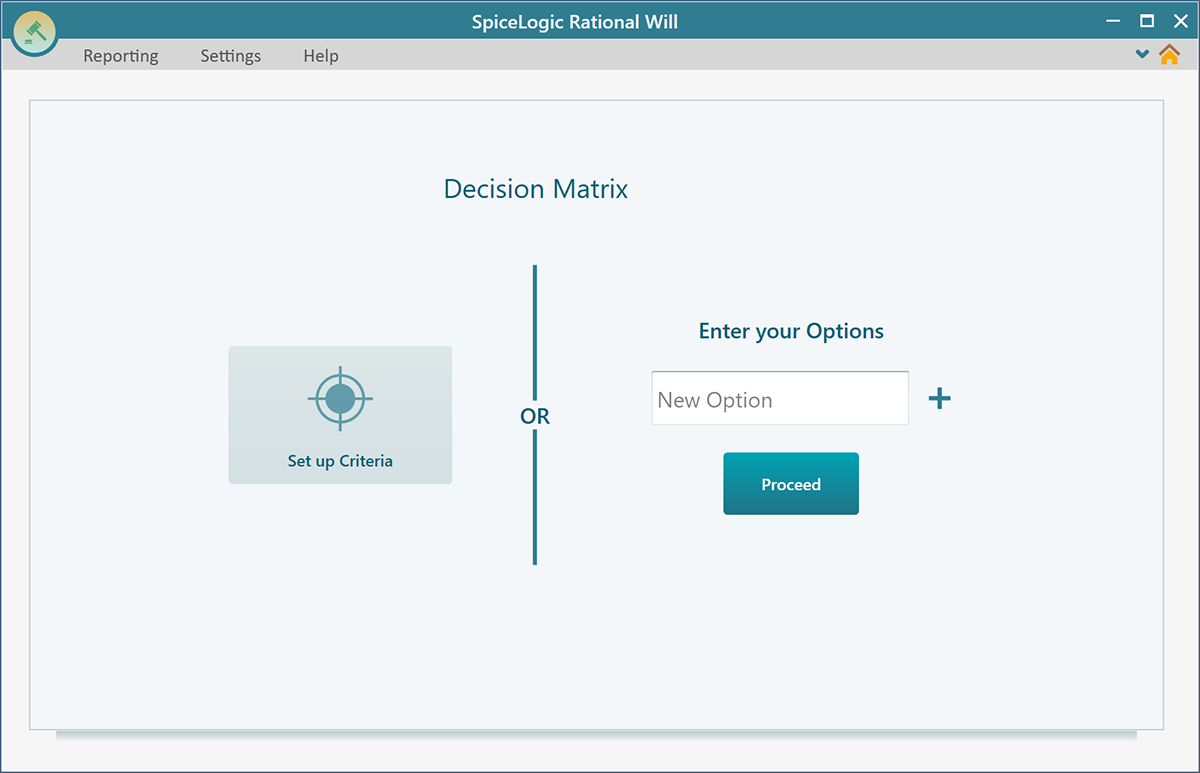
After you click the Decision Matrix button, you will see the screen below. This is your work area. You will build the example here, one step at a time, so do not worry if it looks empty for now.
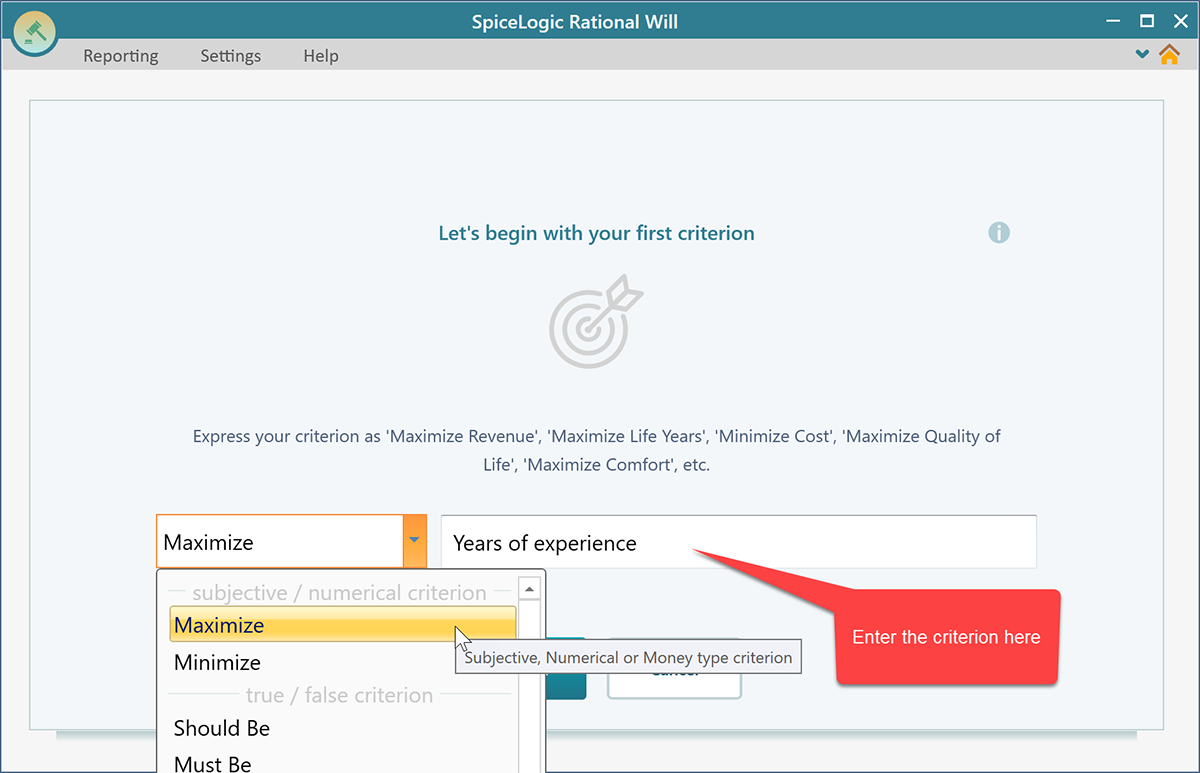
Click the "Set up criteria" button. That opens the wizard shown below. Pick "Maximize" from the drop-down menu, and type "Years of Experience" in the text field, as shown here. We pick Maximize because for this objective more is better. The more years a candidate has, the higher we want their score to be.
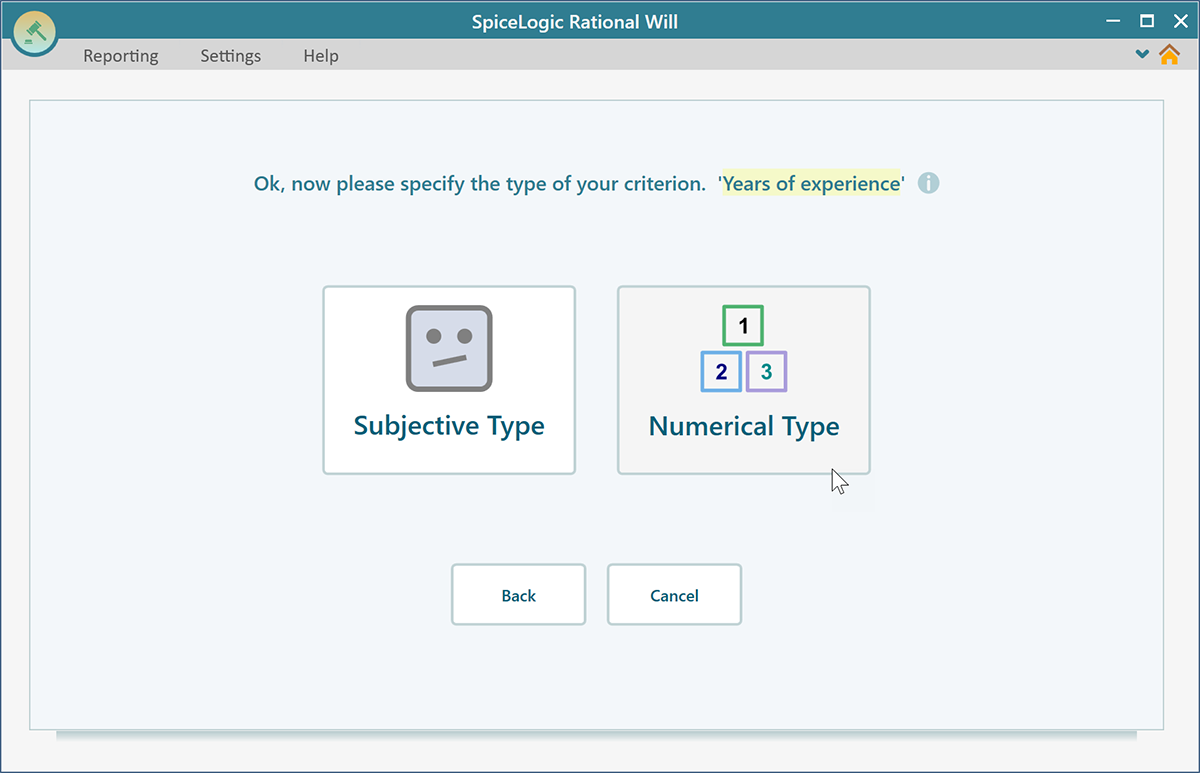
Now click the Proceed button. The next wizard screen asks what kind of objective this is. Years of experience is a plain number, so pick "Numerical Type" on this screen. That tells Rational Will to expect a number for each candidate later on.
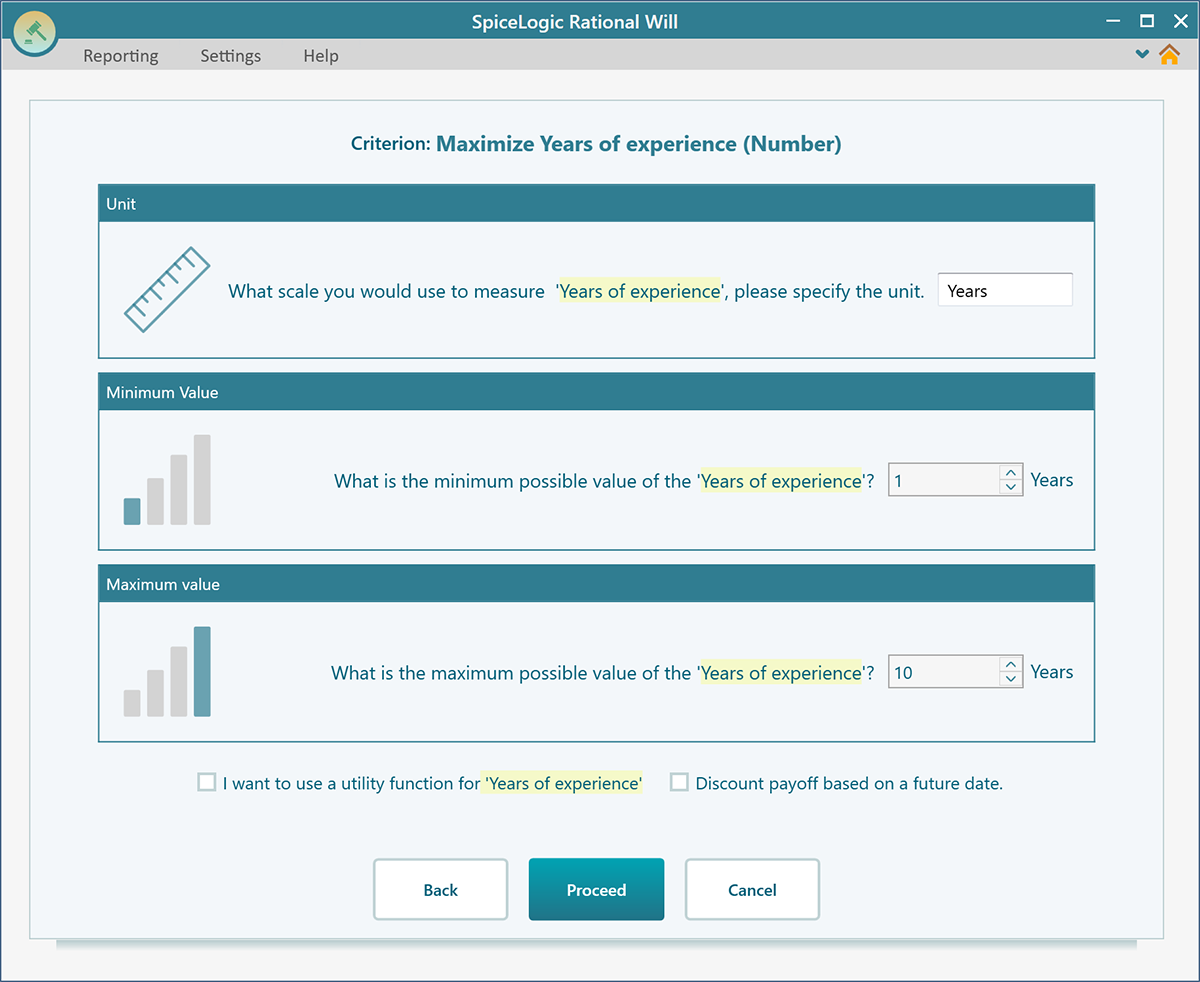
After you pick "Numerical Type", the wizard asks for a Unit, a Minimum, and a Maximum. The minimum and maximum set the range you expect to see, so the software can score every candidate fairly inside that range. Think of it as the lowest and highest you would ever realistically get. Enter "years" for the unit, set Minimum to 1 and Maximum to 10, then click the Proceed button.
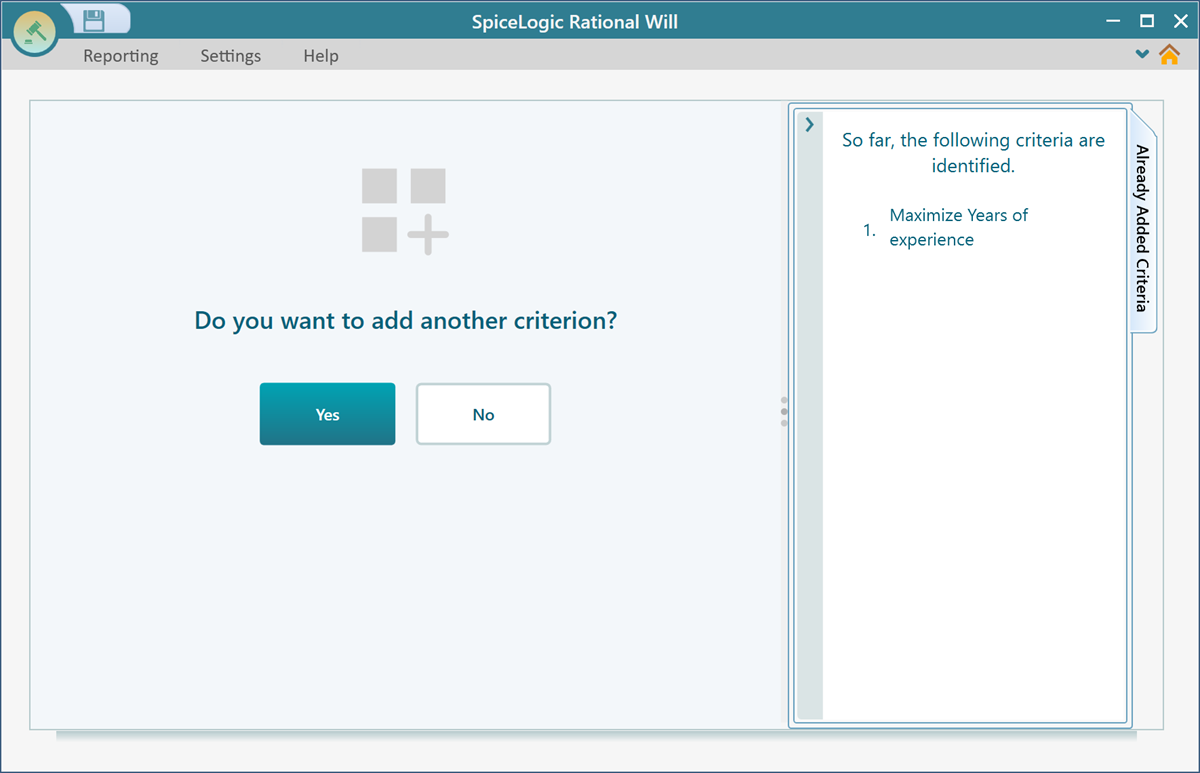
After you click "Proceed", the wizard asks if you want to add another criterion. We still have two more to add, so click YES.
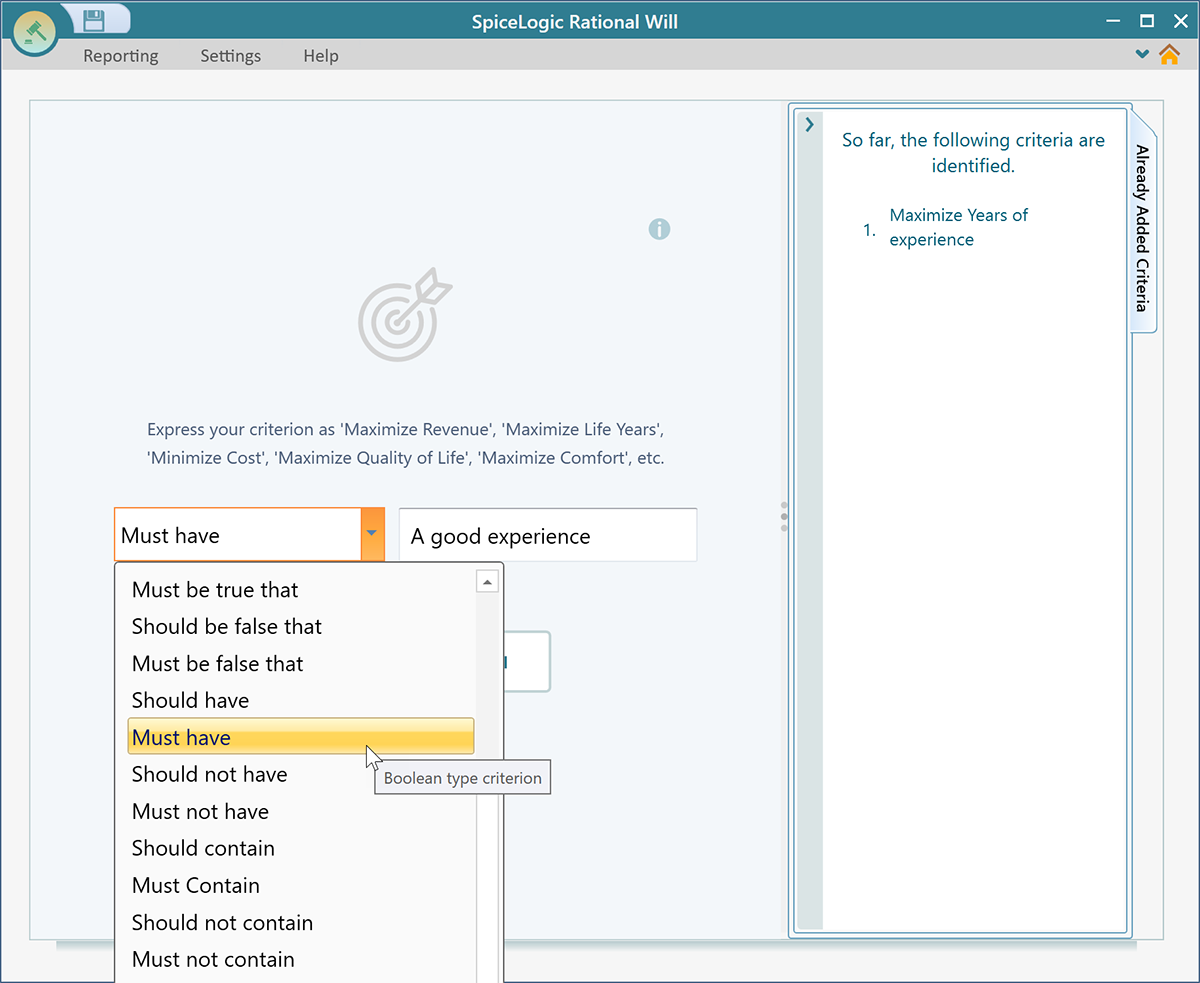
Clicking YES brings you back to the same criteria screen you saw before. This time, pick "Must Have" from the drop-down box and type "a good reference". When you pick "Must Have", Rational Will treats this as a Boolean objective, which is just a yes or no question. Either the candidate has a good reference or they do not. There is nothing in between.
Click the "Proceed" button. You will be asked again whether you want to add another criterion. Click YES, since we have one criterion left. You will land back on the same criteria screen. Pick "Maximize" from the drop-down box and type "Communication Skill" in the text box. When you click Proceed, you will be asked for the objective type. Click "Subjective" on that screen, because communication skill is something you judge for yourself rather than measure with a number.
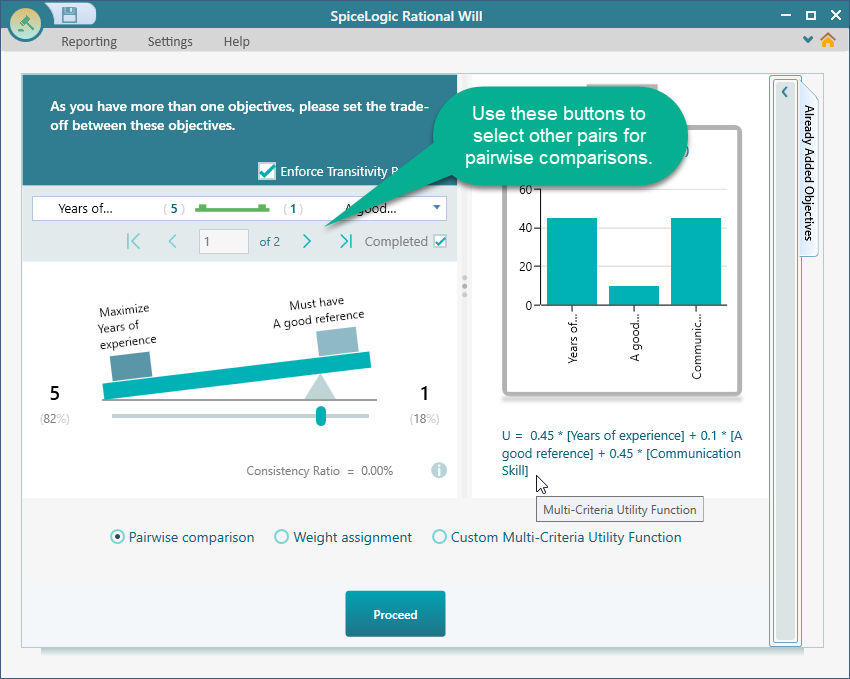
When you say you have no more criteria to add, the wizard asks you to express how the criteria stack up against each other. From your answers, the software works out a single utility function that covers all the criteria. That function is what blends all three scores into one final number for each candidate.
Use the weight slider to say which objectives matter more to you, and by how much. For example, say you care about "Years of Experience" five times as much as having a good reference. Set the slider as shown below.
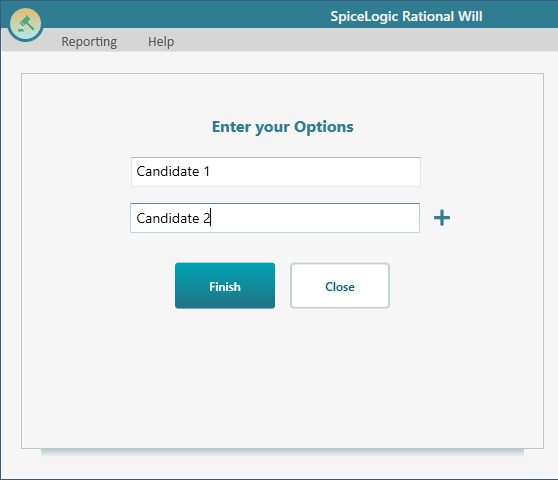
Once you have set all the comparisons and clicked the "Finish" button, you will be asked to name your options. These are the things you are choosing between. Enter the candidate names, as shown below.
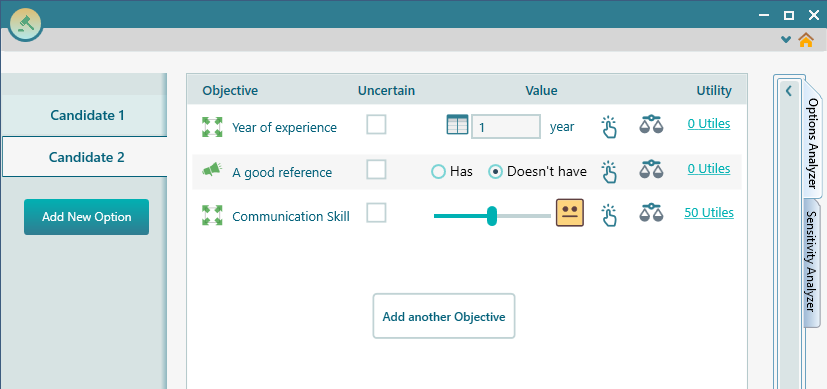
Click the "Finish" button to open the options page. This is where you fill in the actual values for each candidate. The input you see depends on the objective type, so the software always shows the right control for the job. Communication Skill is a Subjective type, so you get a slider you can drag to show how strong each candidate is. Years of Experience is a Numerical type, so you get a number input box. "A good reference" is a Boolean type, so you get two radio buttons, "Has" and "Doesn't have". You do not have to remember which input goes where. Rational Will picks it for you.
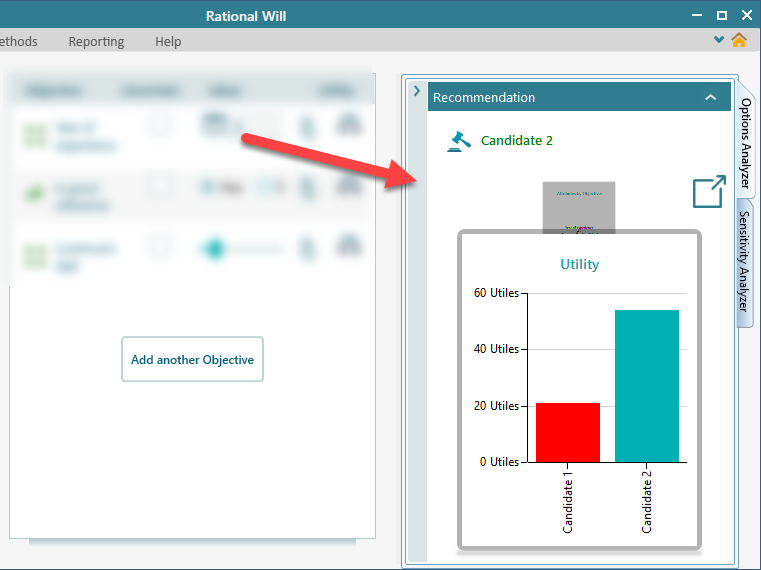
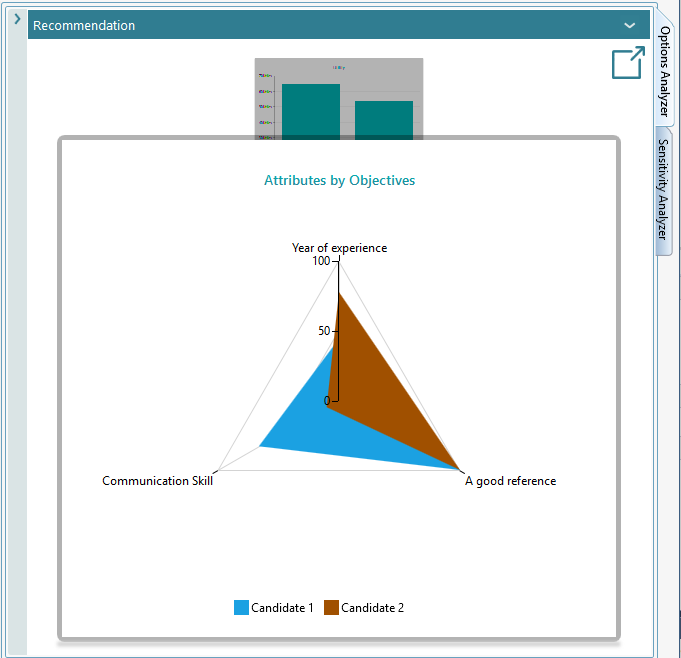
Fill in the values for every candidate. As you enter them, the result updates right away in the Options Analyzer section. Based on the weighted sum, the software gives you a recommendation. You also get a column chart of the weighted sum for each option, so you can see at a glance which candidate fits your preferences and criteria best. For example, if one candidate has a tall bar and the rest are short, your choice is clear.
The carousel also includes a radar chart. The radar chart is handy because it shows each candidate's strengths and weaknesses across all the criteria at once. That makes it easy to spot a candidate who is solid everywhere versus one who is great at a single thing but weak on the rest. To see it clearly, drag the panel a bit larger to give the chart more room. If the panel is too small, the radar chart shows up tiny and hard to read.
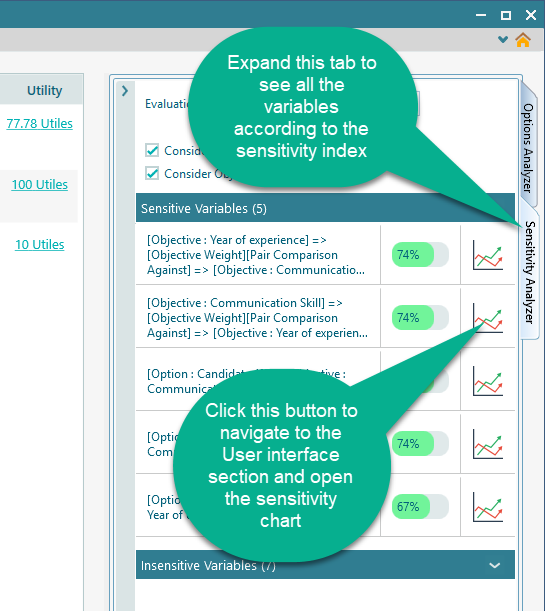
Sensitivity Analysis
Before you commit to a decision, it pays to run a sensitivity analysis so you know how solid that choice really is. The idea is to see which inputs change the outcome the most. If the winner stays the winner even when an input shifts by a fair amount, you can trust the result. If a small change flips the winner, you know that input deserves a closer look before you decide. For example, if dropping one candidate's communication score by a single point puts a different person on top, that score is worth double checking. Click the Sensitivity button next to any input to see how changing that input affects which option wins.
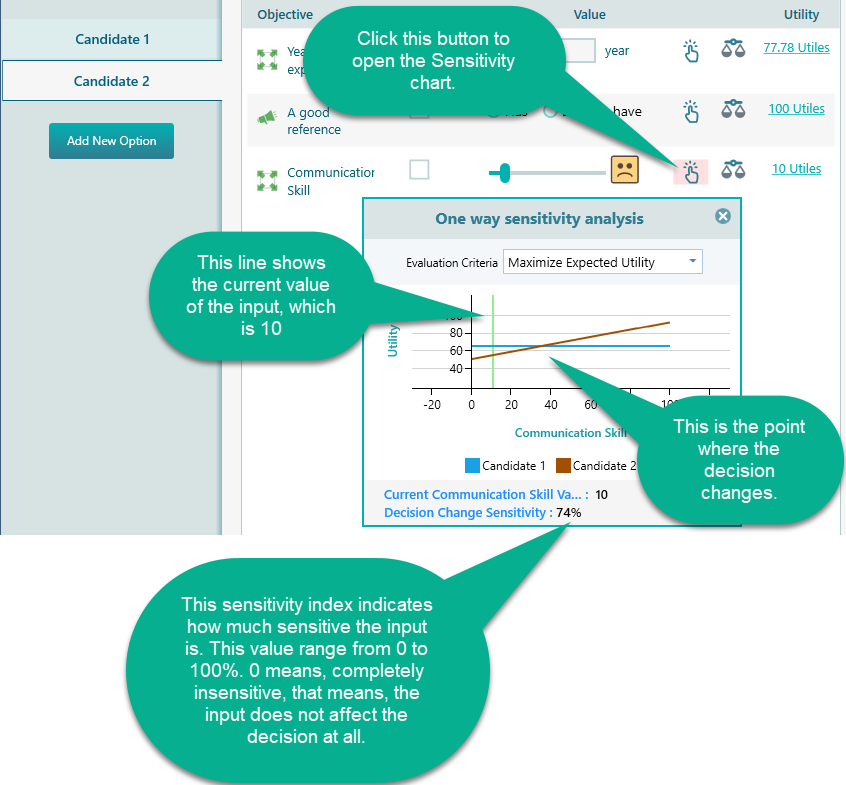
Expand the Sensitivity Analysis tab to see all of your inputs listed by sensitivity index, from highest to lowest. The most sensitive input sits at the top, which tells you the one factor that has the biggest pull on your final choice. That is the input to get right. Click the Chart button to jump straight to that input in the Input section and open its sensitivity chart.