


 NuGet
NuGet
Replacing the default Dialogs
The WPF HTML Editor's built-in dialogs - the image inserter, the hyperlink editor, the table properties panel, and others - are meant to get you started, but they will not always match your application's branding or workflow: a CRM might want its own contact picker wired into the hyperlink dialog, or a locked-down kiosk app might want fewer options in the image dialog. This page shows how to swap any of the built-in dialogs for your own, using the interfaces the editor calls into behind the scenes.
Every customer-replaceable dialog on the WPF editor is defined as an interface in SpiceLogic.HtmlEditor.WPF.Models.Dialogs. Implement the interface with your own dialog to match your application's look and feel. Nine dialogs are replaceable: IImageDialog, IHyperlinkDialog, ITableDialog, ITableCellDialog, ISearchDialog, ISpellCheckerDialog, ISymbolDialog, IStyleBuilderDialog, and IYouTubeVideoInsertDialog. The color picker is also replaceable through IColorPickerDialog if you need a custom palette.
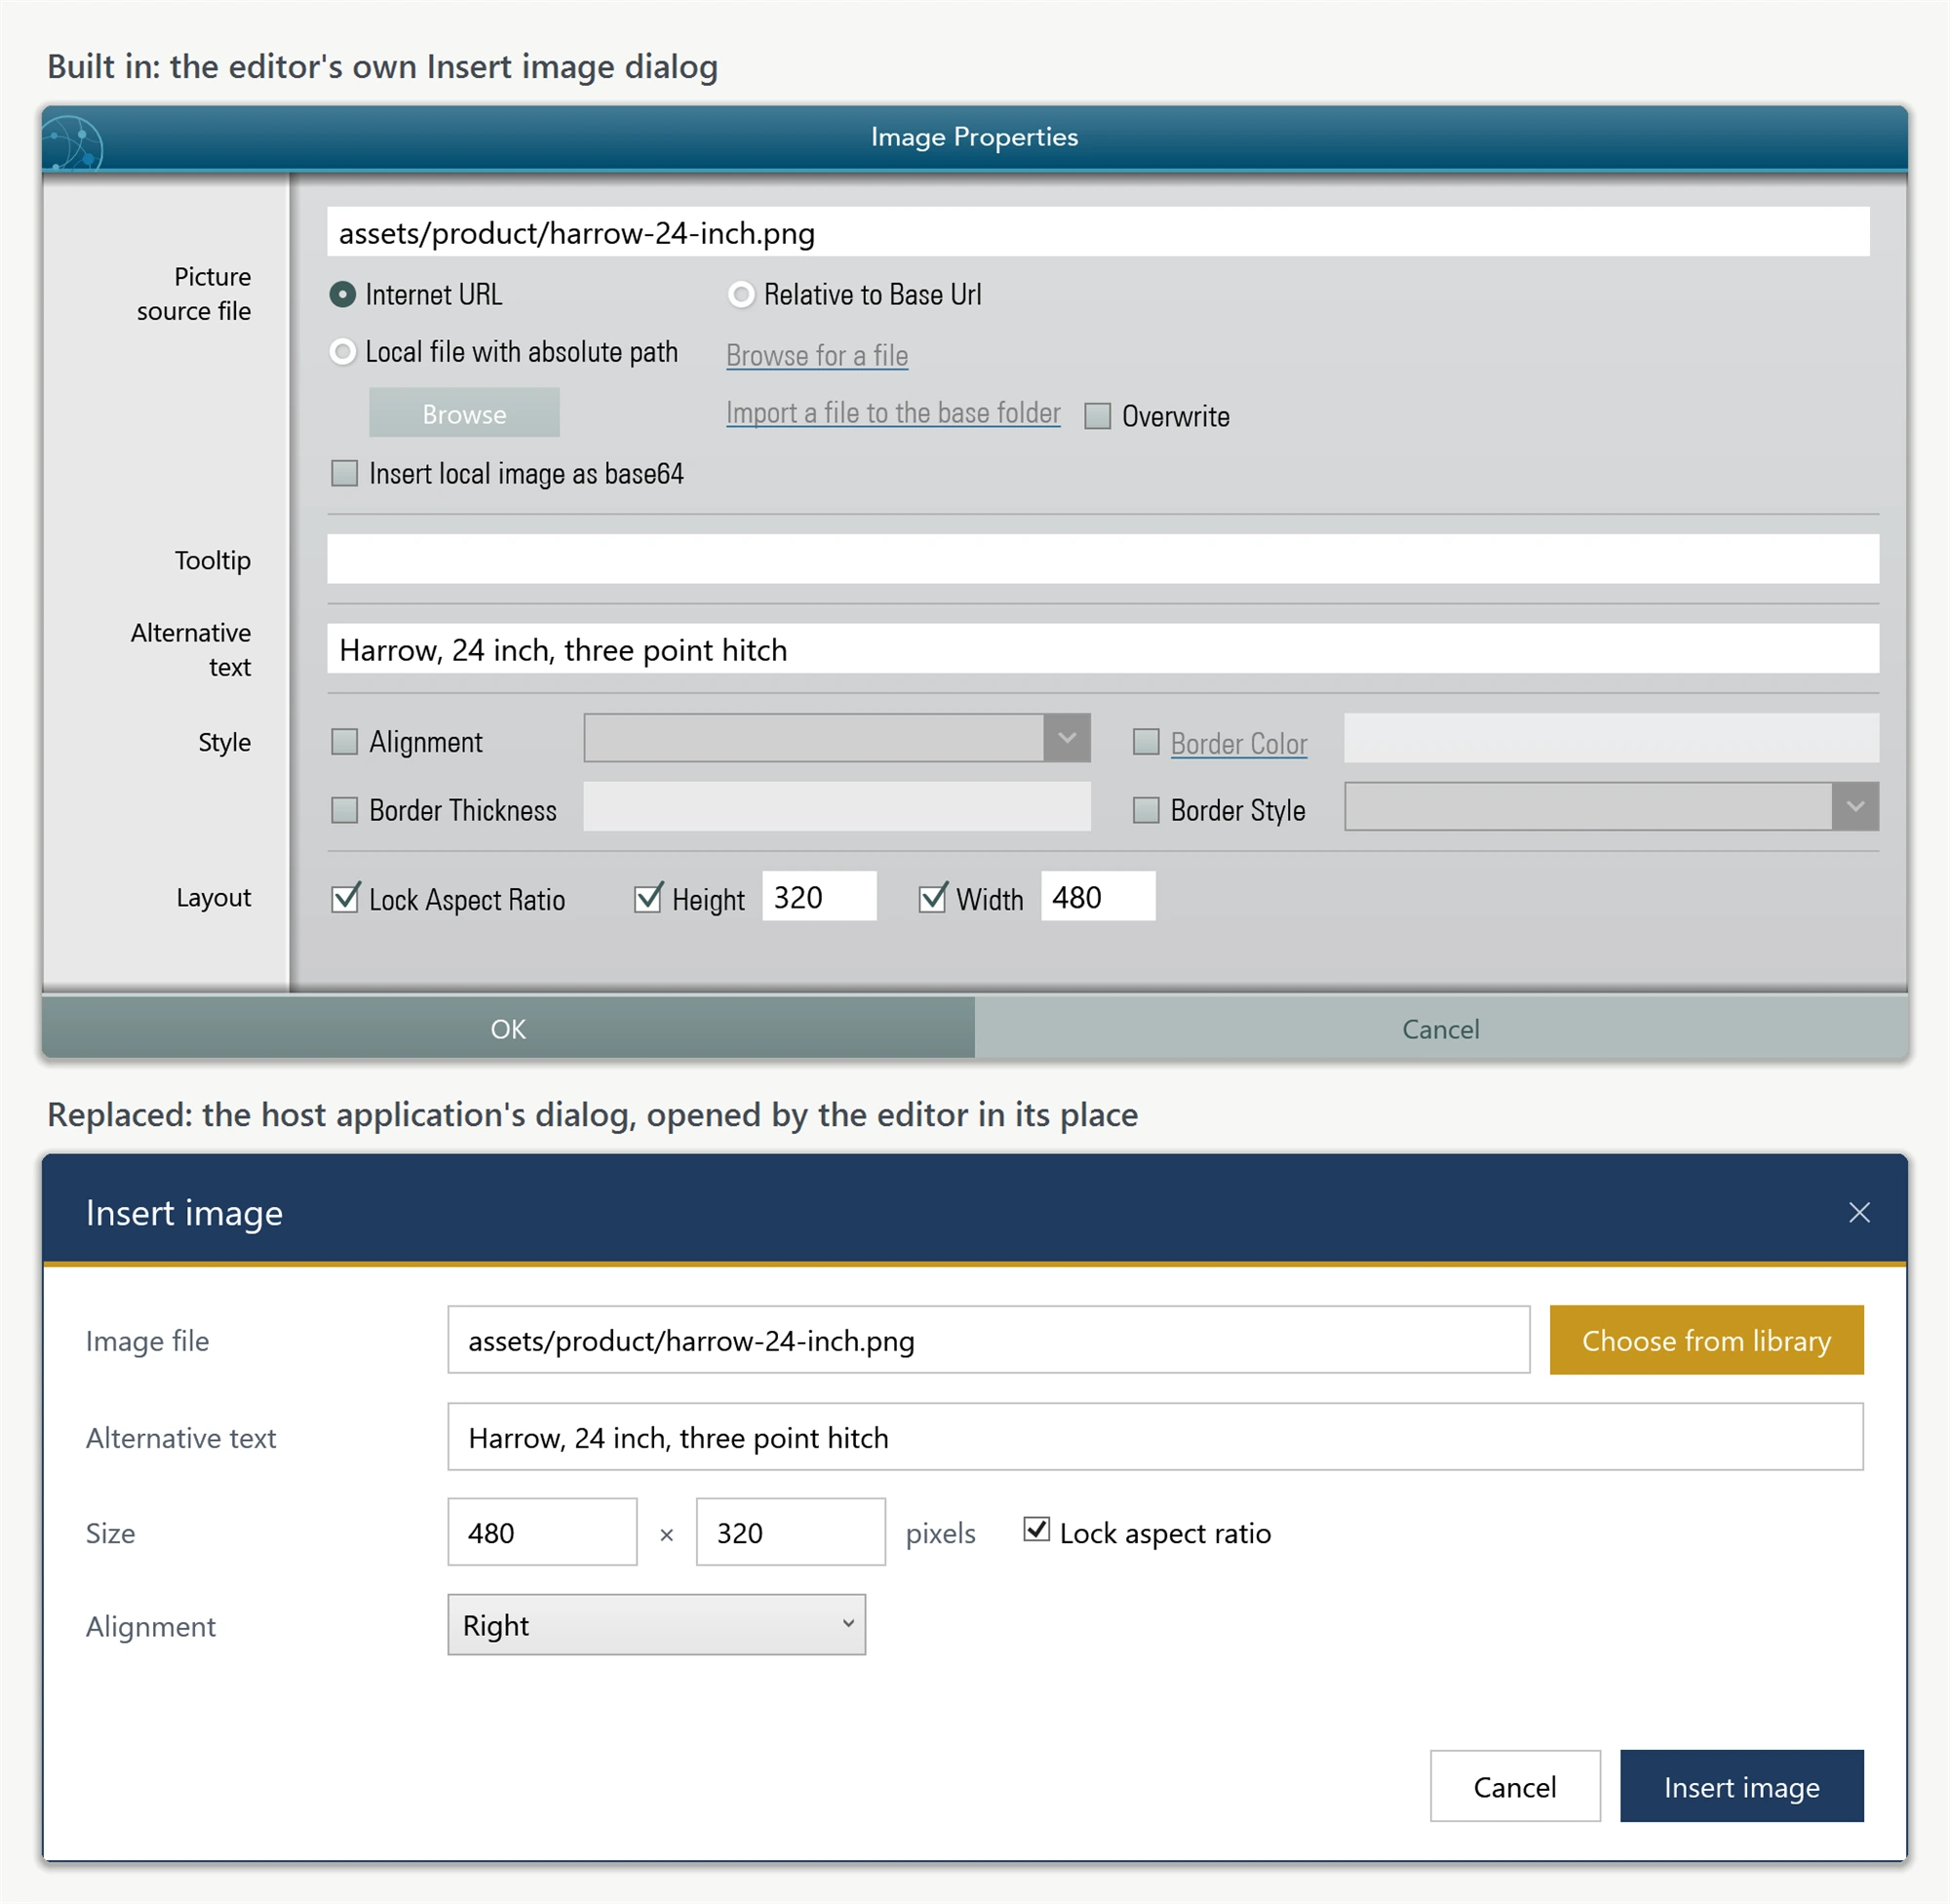
You don't need to rebuild a dialog from scratch. A complete, runnable dialog-customization sample is in our public sample repository: 08-CustomDialog-CS (C#) and 08-CustomDialog-VB (VB.NET). Browse its Dialogs folder to read the default XAML for every replaceable dialog without downloading anything. Copy the XAML you need into your project and restyle it with your own ResourceDictionary.
Wiring a replacement dialog into the editor takes a single line per dialog. Each dialog has a matching CreateXxxDialogMethod factory delegate on IDialogService. The editor calls your factory whenever it needs that dialog:
using SpiceLogic.HtmlEditor.WPF.Models.Dialogs;

public partial class MainWindow : Window
{
    public MainWindow()
    {
        InitializeComponent();
        editor.Dialog.CreateImageDialogMethod = () => new BrandedImageDialog();
        editor.Dialog.CreateHyperlinkDialogMethod = () => new BrandedHyperlinkDialog();
        editor.Dialog.CreateTableDialogMethod = () => new BrandedTableDialog();
        editor.Dialog.CreateSearchDialogMethod = () => new BrandedSearchDialog();
    }
}
Imports SpiceLogic.HtmlEditor.WPF.Models.Dialogs
Partial Public Class MainWindow
Inherits Window
Public Sub New()
InitializeComponent()
editor.Dialog.CreateImageDialogMethod = Function() New BrandedImageDialog()
editor.Dialog.CreateHyperlinkDialogMethod = Function() New BrandedHyperlinkDialog()
editor.Dialog.CreateTableDialogMethod = Function() New BrandedTableDialog()
editor.Dialog.CreateSearchDialogMethod = Function() New BrandedSearchDialog()
End Sub
End ClassBecause a replacement dialog is based on the default source, it already implements the required interface (for example IImageDialog) and inherits from Window. The editor sets the input properties on the dialog, calls ShowDialog(), and reads the result properties back - exactly the contract the interface defines.
By default, replacement dialogs open center-screen rather than centered over your application. Set OwnerWindow on the dialog service to fix the parenting so every dialog the editor opens centers over your main window:
editor.Dialog.OwnerWindow = this; // "this" is the host Windoweditor.Dialog.OwnerWindow = Me ' "this" is the host Window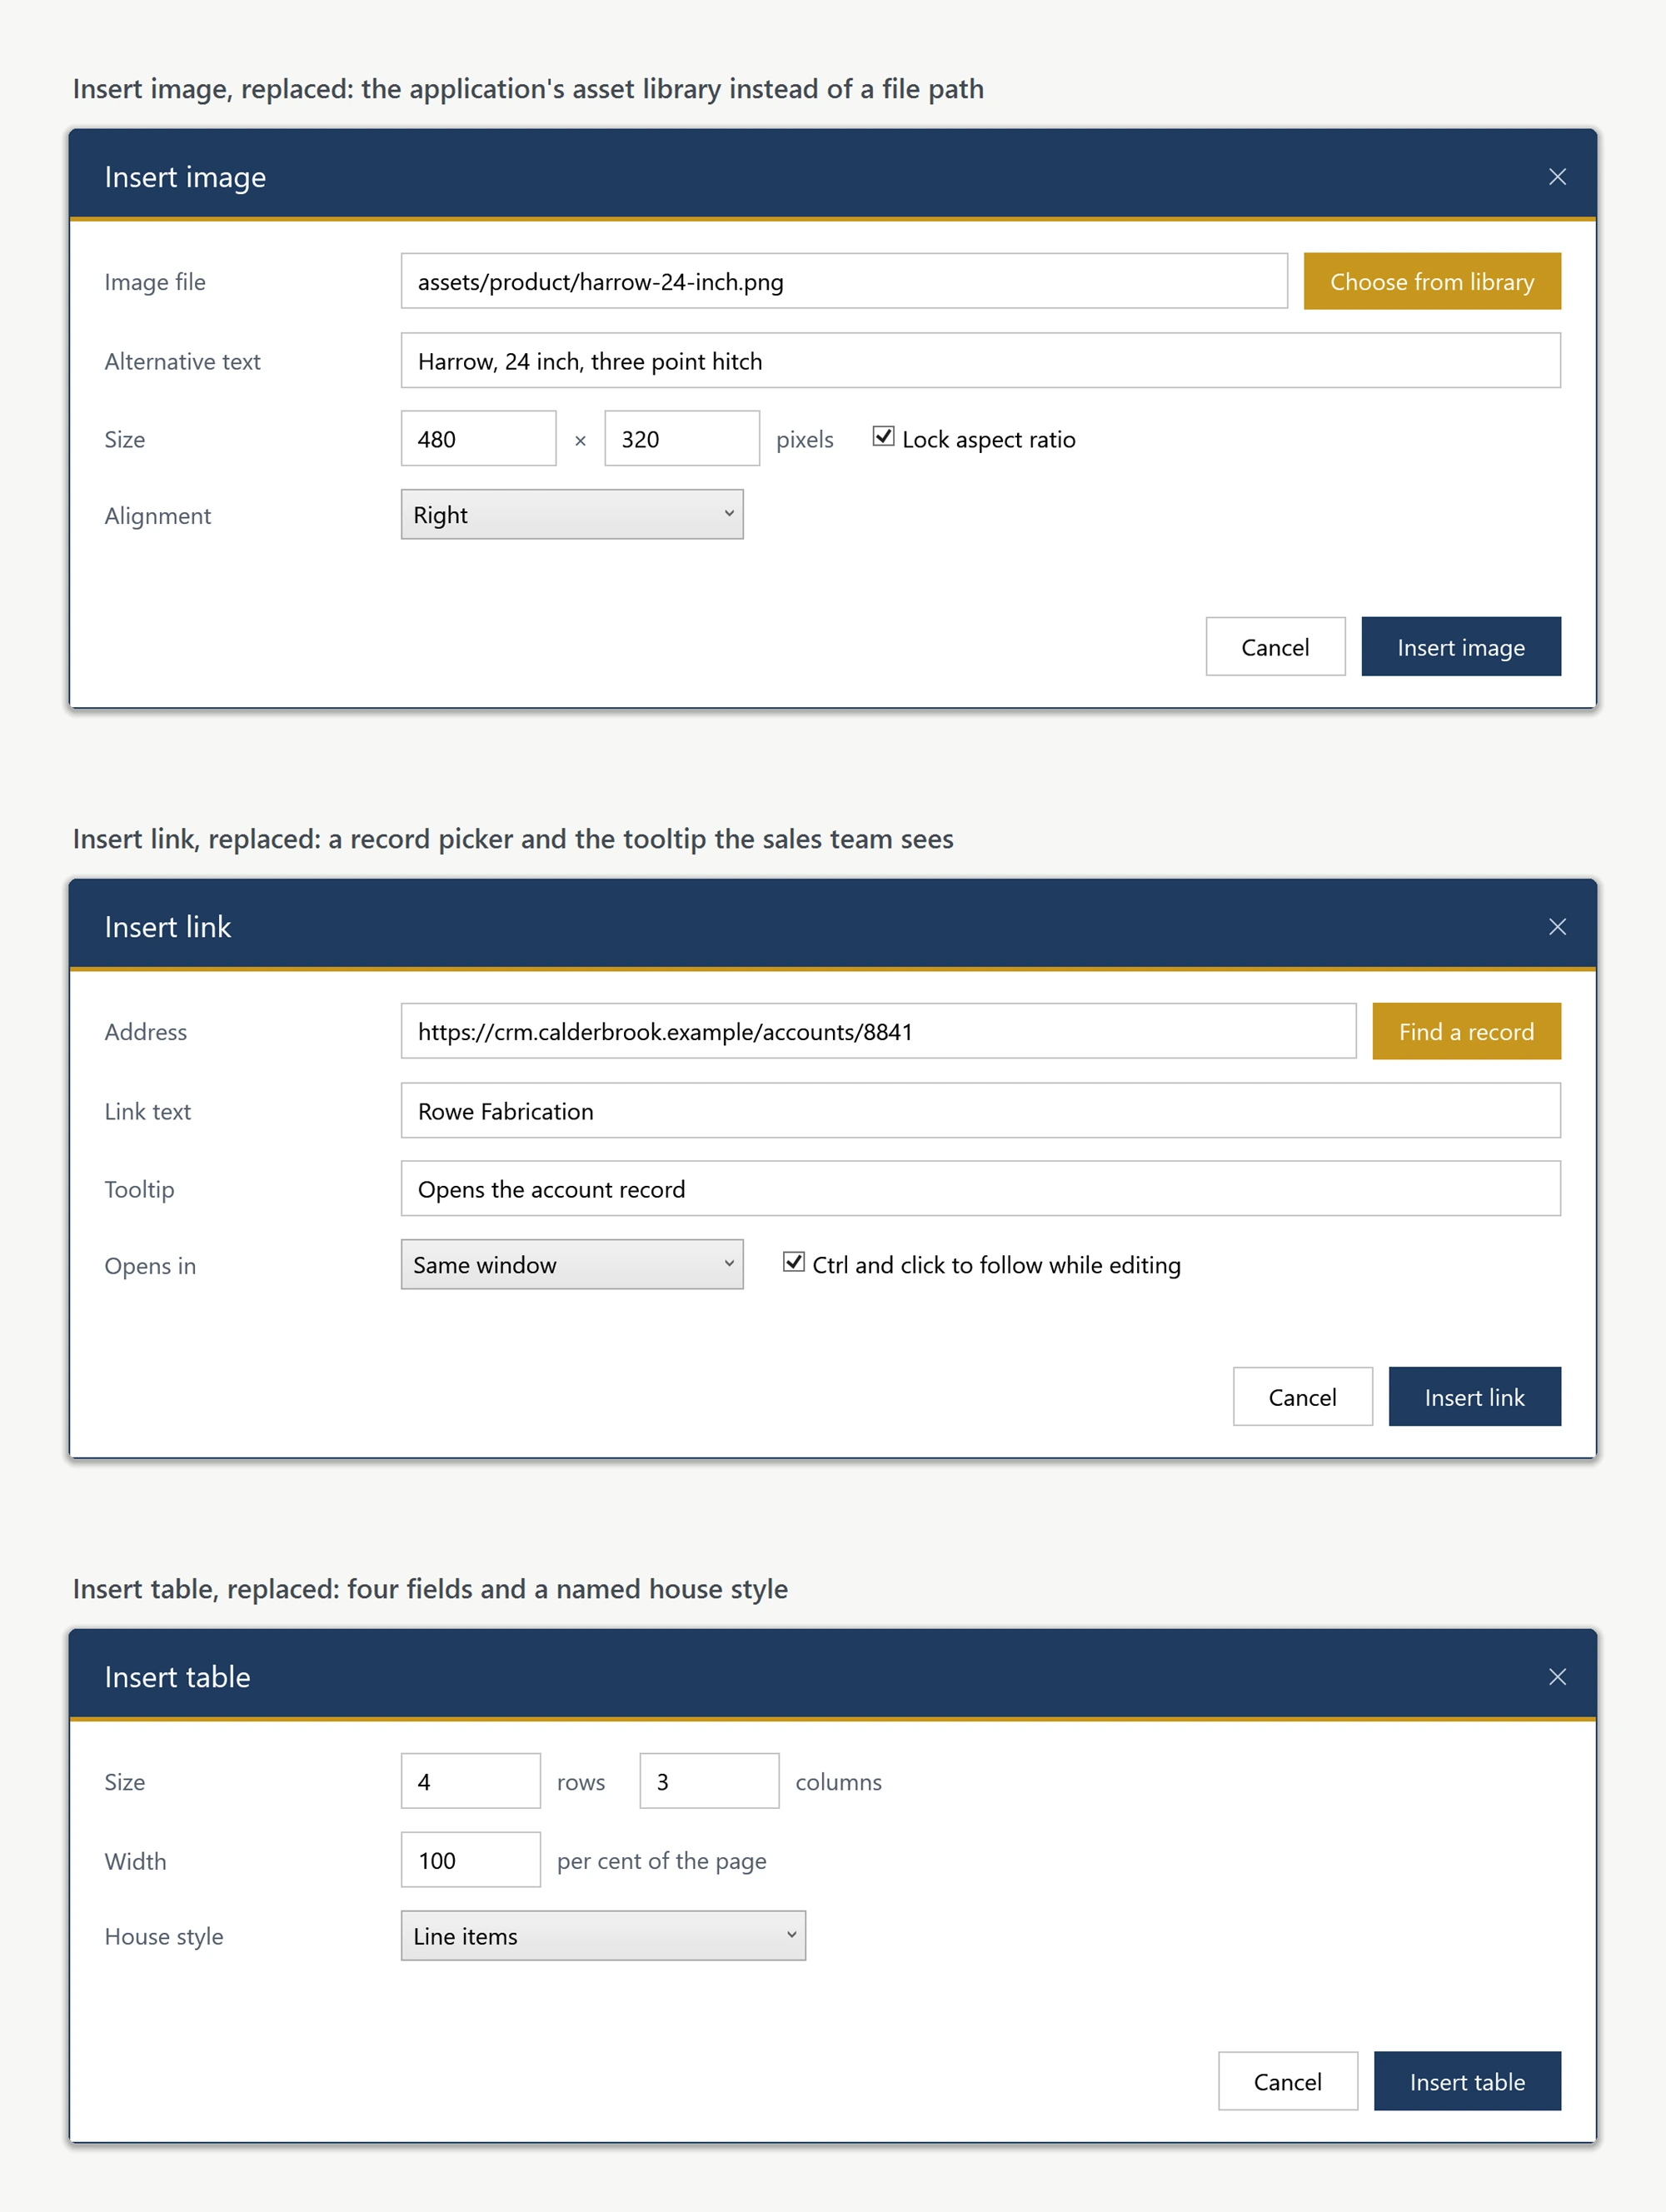
Ask your AI to do this
Let your assistant do this for you. With the SpiceLogic MCP server connected, paste this into Claude Code, Cursor, or VS Code Copilot in agent mode.
Using the SpiceLogic WPF HTML Editor in my project, replace the built-in hyperlink dialog with my own branded dialog that matches my app's CRM look, by implementing IHyperlinkDialog from SpiceLogic.HtmlEditor.WPF.Models.Dialogs and wiring it into the editor through the matching CreateHyperlinkDialogMethod factory delegate on IDialogService. Start from the default dialog XAML in the Dialogs folder of the 08-CustomDialog-CS sample at github.com/spicelogic/wpf-html-editor-control-samples and restyle it with my own ResourceDictionary rather than building the layout from scratch. Confirm the exact interface members and the IDialogService factory delegate name with the SpiceLogic MCP tools before writing any code.