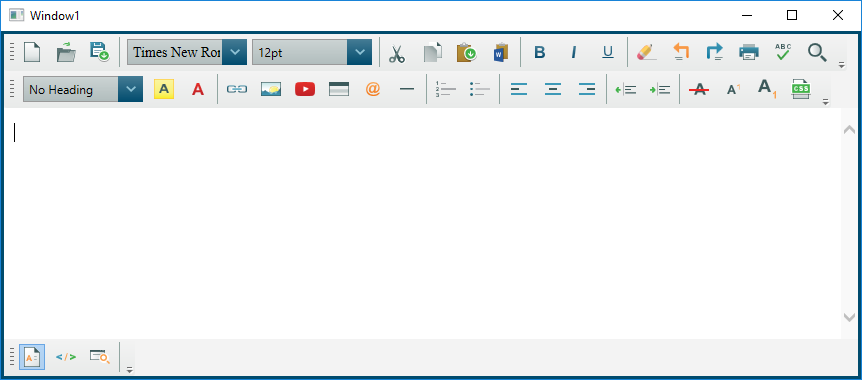
Getting Started with WPF HTML editor control
Download the zip file containing the WPF HTML editor control from our website.
Step 0: As soon as you download the zip file from our website, please right click on the files SpiceLogicWPFHtmlEditor.dll and SpiceLogicWPFHtmlEditor.VisualStudio.Design.dll, select Properties and then click the Unblock button. If you do not unblock the dlls, then you will face the following messages adding the editor to your Visual Studio Toolbox:

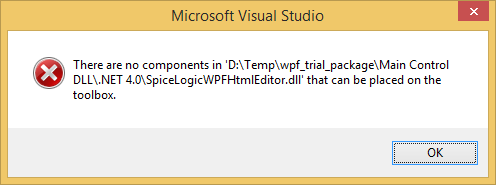
Or the following message if you have the editor in your XAML markup:

If you don't see the Unblock button from Properties dialog, then, don't worry about that. Perhaps, your operating system has already got it unblocked.
Step 1: Now you can add the editor to your Visual Studio Toolbox. You can do that using item "Choose Items..." in the context menu of your Visual Studio Toolbox:
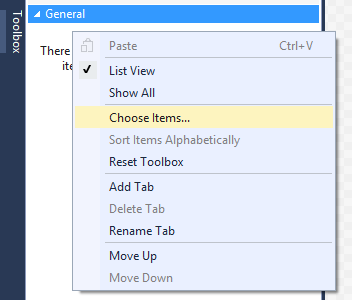
"Choose Toolbox Items" dialog will be opened. On the tab "WPF Components" you will see all installed WPF components. In order to add the editor, please click button "Browse...", select SpiceLogicWPFHtmlEditor.dll and press button "OK". WPF HTML editor control will be added to your Visual Studio Toolbox.
Please make sure that your hosting application targets either .NET 4 (full or Client Profile), or .NET 4.5 or .NET 4.5.1. or any later version of .NET framework.
Drag&drop adding
Step 2: Now you can drag and drop an instance of the control to your WPF application and you are ready to go. You can skip next steps if you use drag&drop adding.
Manual adding (using XAML editor)
Alternatively you can add the editor to your WPF Window manually using XAML editor.
Step 2: Add a reference to 'SpiceLogicWPFHtmlEditor.dll'.
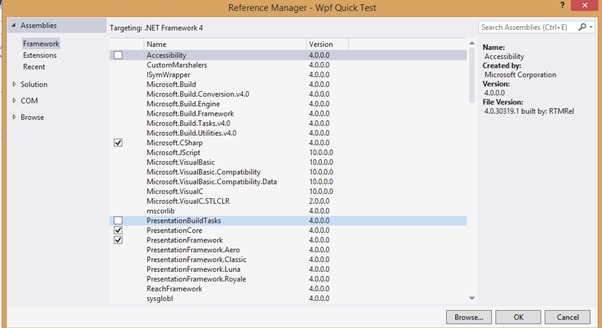
Within your Visual Studio, in the Solution Explorer window, right-click on your project, hover your mouse over Add option and then click on Reference.
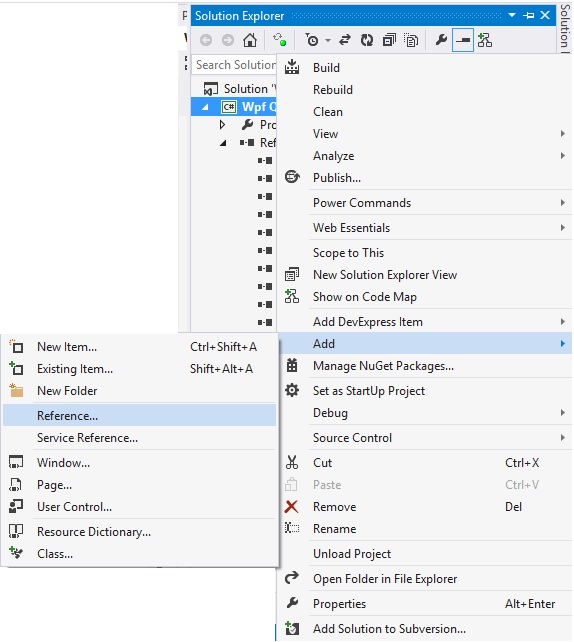
Click Browse button to locate the Control DLL within the folder which is unzipped from the downloaded file.
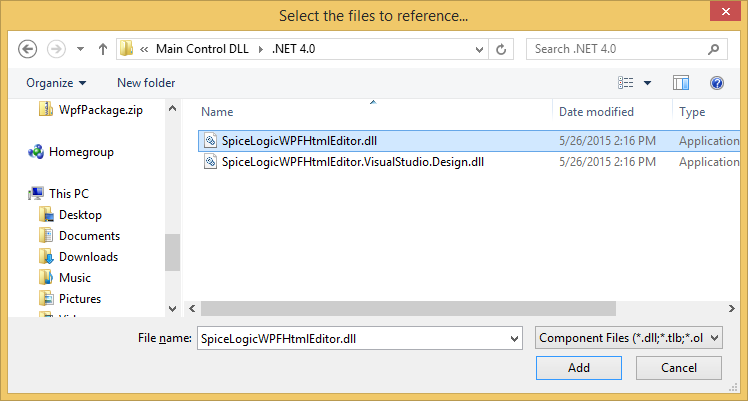
Browse the folder. Then choose the file named 'SpiceLogicWPFHtmlEditor.dll' and click on Add button.
Now the DLL file has been added to your project.
Step 3: Add a reference to Microsoft.mshtml.dll from the editor package.
Open "Reference Manager" window (see previous step for instructions), click button "Browse..." and choose Microsoft.mshtml.dll from the editor package (it is located in the folder "Main Control DLL").
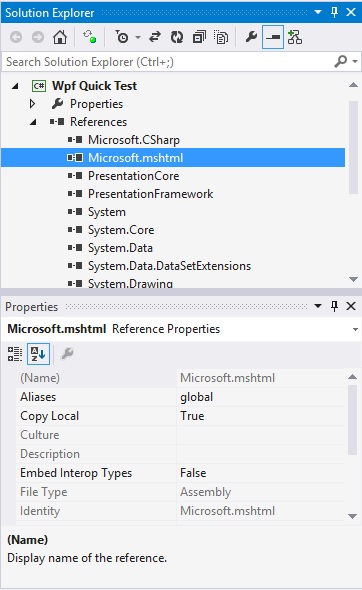
Step 4: Set properties of Microsoft.mshtml.dll reference in "Properties" tool.
- You may find that the Embed Interop Type for Microsoft.mshtml.dll is set as True. Please change that to False.
- Set Copy Local = True for Microsoft.mshtml.dll so that this dll is also published along with the SpiceLogicWPFHtmlEditor.dll and make sure this dll is available with other deployable assemblies when you create your installer.
Step 5: Add WPF Html editor control in your XAML editor.
Example of XAML code of a simple window using WPF Html editor control without any configuration:
<Window x:Class="WpfApplication1.MainWindow"
        xmlns="http://schemas.microsoft.com/winfx/2006/xaml/presentation"
        xmlns:x="http://schemas.microsoft.com/winfx/2006/xaml"
        xmlns:wpfHtmlEditor="clr-namespace:SpiceLogic.WpfHtmlEditor;assembly=SpiceLogicWPFHtmlEditor"
        Title="MainWindow" Height="350" Width="900">
    <Grid>
        <wpfHtmlEditor:WpfHtmlEditor></wpfHtmlEditor:WpfHtmlEditor>
    </Grid>
</Window>
Below is another sample XAML code for using the WPF HTML editor that includes Options and SpellCheckOptions:
<Window
    xmlns="http://schemas.microsoft.com/winfx/2006/xaml/presentation"
    xmlns:x="http://schemas.microsoft.com/winfx/2006/xaml"
    xmlns:wpfHtmlEditor="clr-namespace:SpiceLogic.WpfHtmlEditor;assembly=SpiceLogicWPFHtmlEditor"
    xmlns:userOptions="clr-namespace:SpiceLogic.WpfHtmlEditor.Domain.BOs.UserOptions;assembly=SpiceLogicWPFHtmlEditor"
    xmlns:UserOptions="clr-namespace:SpiceLogic.HtmlEditorControl.Domain.BOs.UserOptions;assembly=SpiceLogicWPFHtmlEditorDomain"
    x:Class="Wpf_Quick_Test.Window1"
    Title="Window1" Height="387" Width="911.049">
    <Grid>
        <wpfHtmlEditor:WpfHtmlEditor >
            <wpfHtmlEditor:WpfHtmlEditor.Options>
                <userOptions:UserOption/>
            </wpfHtmlEditor:WpfHtmlEditor.Options>
            <wpfHtmlEditor:WpfHtmlEditor.SpellCheckOptions>
                <UserOptions:SpellCheckerOption FireInlineSpellCheckingOnKeyStroke="True">
                    <UserOptions:SpellCheckerOption.DictionaryFile>
                        <UserOptions:DictionaryFileInfo/>
                    </UserOptions:SpellCheckerOption.DictionaryFile>
                </UserOptions:SpellCheckerOption>
            </wpfHtmlEditor:WpfHtmlEditor.SpellCheckOptions>
        </wpfHtmlEditor:WpfHtmlEditor>
    </Grid>
</Window>
Once you use the provided XAML, the designer will show the editor as follows.
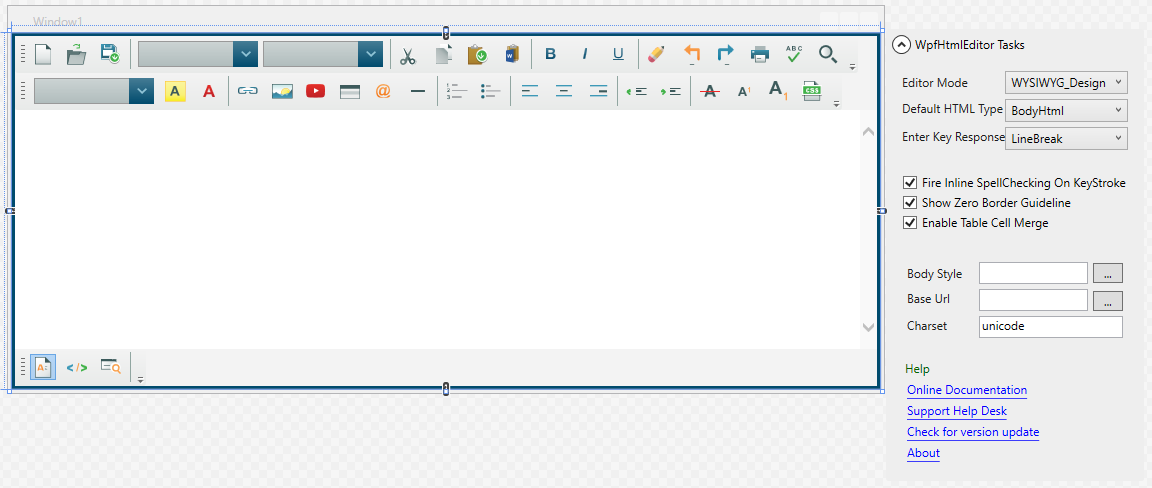
If you do not see the design time menu ("WpfHtmlEditor Tasks"), then please make sure, that you have SpiceLogicWPFHtmlEditor.VisualStudio.Design.dll beside your referenced SpiceLogicWPFHtmlEditor.dll. You must not reference SpiceLogicWPFHtmlEditor.VisualStudio.Design.dll because you will have build errors. Also, you should not distribute SpiceLogicWPFHtmlEditor.VisualStudio.Design.dll to end users of your application because SpiceLogicWPFHtmlEditor.VisualStudio.Design.dll is used only by Visual Studio in design time when you set up the editor and change XAML of your application.
And when you run the application, it will look like this.
