


Make your own buttons context-aware
Once you build a custom toolbar or ribbon for the WinForms HTML Editor, for example your own Bold, Italic, and Insert Image buttons styled for a CRM notes panel or an offer-letter composer, those buttons face a problem the built-in toolbar never has: nothing tells them what the editor is currently showing. A custom toolbar (for example, a Word-style ribbon with your own icons) that calls into WinFormHtmlEditor with the factory toolbars hidden needs to reflect the editor's current formatting state, not just send commands to it. Without this, a button like Bold stays unpressed even when the caret is inside bold text, which is disorienting for users used to Word-style feedback. This page shows how to keep your own buttons in sync with the editor as the user types, clicks, and selects.
The two members that solve this
Two members on WinFormHtmlEditor handle it. The event SelectionChanged fires whenever the caret moves or the selection changes: typing, arrow keys, mouse clicks, paste, or a programmatic edit. The service StateQuery, an IStateQueryService, is the same service the built-in toolbar uses to drive its own pressed-state logic. Hook the event, query the service on each fire, and update your controls.
private void ManuscriptForm_Load(object sender, EventArgs e) { htmlEditor1.SelectionChanged += HtmlEditor_SelectionChanged; } private void HtmlEditor_SelectionChanged(object sender, EventArgs e) { var sq = htmlEditor1.StateQuery; // Toggle pressed state on the ribbon buttons. ribbonBoldButton.Checked = sq.IsBold(); ribbonItalicButton.Checked = sq.IsItalic(); ribbonUnderlineButton.Checked = sq.IsUnderline(); // Highlight Insert Image when an image is the active element. ribbonImageButton.BackColor = sq.IsImage() ? SystemColors.Highlight : SystemColors.Control; // Show the active font in the status bar. lblActiveFont.Text = sq.GetActiveFontFamilyName(); lblActiveSize.Text = sq.GetActiveFontSize(); }Private Sub ManuscriptForm_Load(sender As Object, e As EventArgs) htmlEditor1.SelectionChanged += AddressOf HtmlEditor_SelectionChanged End Sub Private Sub HtmlEditor_SelectionChanged(sender As Object, e As EventArgs) Dim sq = htmlEditor1.StateQuery ' Toggle pressed state on the ribbon buttons. ribbonBoldButton.Checked = sq.IsBold() ribbonItalicButton.Checked = sq.IsItalic() ribbonUnderlineButton.Checked = sq.IsUnderline() ' Highlight Insert Image when an image is the active element. ribbonImageButton.BackColor = If(sq.IsImage(), SystemColors.Highlight, SystemColors.Control) ' Show the active font in the status bar. lblActiveFont.Text = sq.GetActiveFontFamilyName() lblActiveSize.Text = sq.GetActiveFontSize() End Sub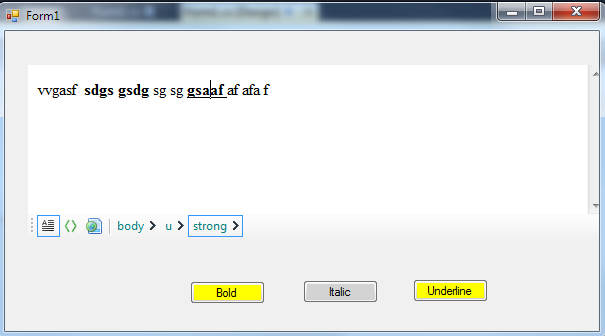
What StateQuery exposes
The IStateQueryService interface exposes the current editor state so you can keep toolbar/ribbon buttons in sync with the selection, without polling.
- Inline formatting:
IsBold(),IsItalic(),IsUnderline(),IsStrikeThrough(),IsSuperscript(),IsSubscript(). - Block formatting:
IsOrderedList(),IsUnorderedList(),IsJustifyLeft(),IsJustifyCenter(),IsJustifyRight(),IsActiveElementHeaderTitle(),GetActiveHeaderTitleNumber(). - Active element kind:
IsHyperLink(),IsImage(),IsTable(),IsTableCell(),IsYouTubeVideo(),IsActiveOrAncestorElementTable(),IsActiveOrAncestorElementHyperLink(). - Font:
GetActiveFontFamilyName(),GetActiveFontSize(),GetActiveForeColor(),GetActiveHighlightColor(). - Edit-state guards:
CanUndo(),CanRedo(),CanCut(),CanCopy(),CanPaste(),CanDelete(),CanMergeTableCells(). - Low-level access:
GetActiveHtmlElement()returns the rawIHTMLElementwhen the high-level helpers don't cover an attribute you need.
Driving Undo/Redo enabled state
Undo and Redo buttons should only be enabled when there is actually something to undo or redo. Extend the same SelectionChanged handler:
private void HtmlEditor_SelectionChanged(object sender, EventArgs e) { var sq = htmlEditor1.StateQuery; ribbonBoldButton.Checked = sq.IsBold(); ribbonItalicButton.Checked = sq.IsItalic(); ribbonUnderlineButton.Checked = sq.IsUnderline(); ribbonUndoButton.Enabled = sq.CanUndo(); ribbonRedoButton.Enabled = sq.CanRedo(); ribbonPasteButton.Enabled = sq.CanPaste(); }Private Sub HtmlEditor_SelectionChanged(sender As Object, e As EventArgs) Dim sq = htmlEditor1.StateQuery ribbonBoldButton.Checked = sq.IsBold() ribbonItalicButton.Checked = sq.IsItalic() ribbonUnderlineButton.Checked = sq.IsUnderline() ribbonUndoButton.Enabled = sq.CanUndo() ribbonRedoButton.Enabled = sq.CanRedo() ribbonPasteButton.Enabled = sq.CanPaste() End Sub
The performance footnote
The SelectionChanged handler can fire often, so keep it cheap. Calls into StateQuery are inexpensive, but avoid anything heavy inside the handler: no network calls, no file I/O, and no layout-triggering reflows of large panels. If a reaction to selection changes cannot run synchronously, defer it to a short-debounce System.Windows.Forms.Timer so long edit sessions don't stutter.
Ask your AI to do this
Let your assistant do this for you. With the SpiceLogic MCP server connected, paste this into Claude Code, Cursor, or VS Code Copilot in agent mode.
Using the SpiceLogic WinForms HTML Editor already referenced in my project, keep a custom "Bold" ribbon button in sync with the editor by hooking the SelectionChanged event and querying the StateQuery service's IsBold method to toggle the button's pressed state as the caret moves through the document. Keep the handler itself lightweight, and defer anything heavier to a debounced timer so long edit sessions don't stutter. Verify the IStateQueryService method signatures against the SpiceLogic MCP tools first, then write the handler.