

Installing / Deploying the Control
Installing this control/component is nothing but adding the DLL file to your project Reference.
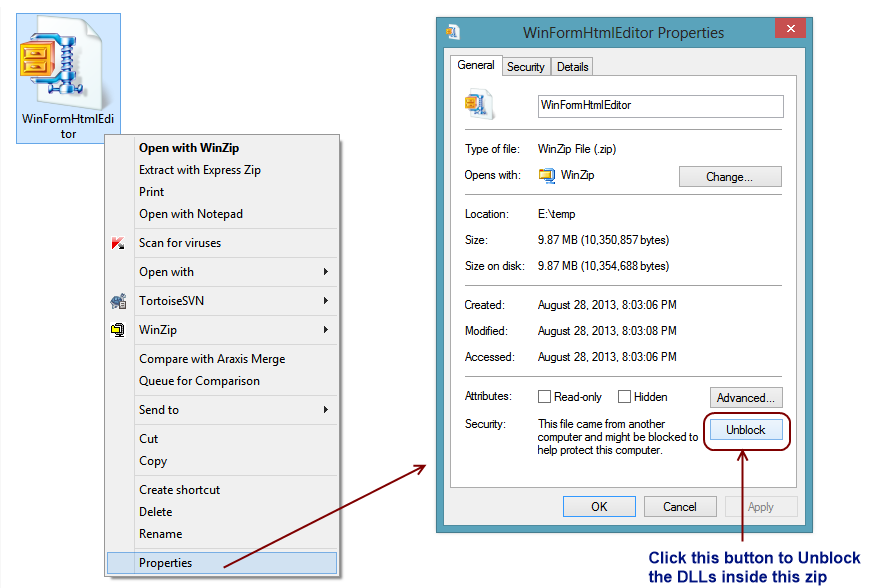
As soon as you download the zip file from our website, please right click on the file, select Properties and then, Click the Unblock button.
If you dont do so, visual studio will throw Build Error using these dlls. If you dont see the Unblock button from Properties dialog, then, dont worry about that. Perhaps, your operating system has already got it unblocked.
Here is an example about how to unblock a zip file.
Once you unzipped the file, you will find a folder named Core DLL. You will find 3 files there.
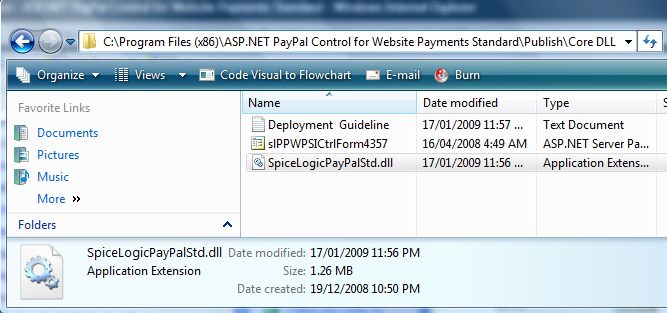
If you are using ASP.NET MVC Framework, then, you just need to locate the "SpiceLogicPayPalStd.dll" file and add that that DLL file to your Project Reference.
If you are planning to use the controls to your Web Form application or simple ASP.NET Website project then,
- Add this control to your Visual Studio toolbox and place an instance of this control from your toolbox into your web form.
- Import the file "slPPWPSICtrlForm4357.aspx" into your web application's root folder so that the relative URL of this file becomes "~/slPPWPSICtrlForm4357.aspx". If you do not want to place slPPWPSICtrlForm4357.aspx in your Web Application's root folder then set the control's property named "InternalSettings.PPFormURL" by the URL of this file (slPPWPSICtrlForm4357.aspx) location. By default, this property is set with the value "~/slPPWPSICtrlForm4357.aspx".
How to Add the Control to your Visual Studio Toolbox ? (Web Form usage)
Within your Visual Studio or Visual Web Developer Express, focus on the tab in the Toolbox where you want to place the PayPal Controls, and Right Click your Mouse to open the Context menu, and select the menu 'Choose Items'.
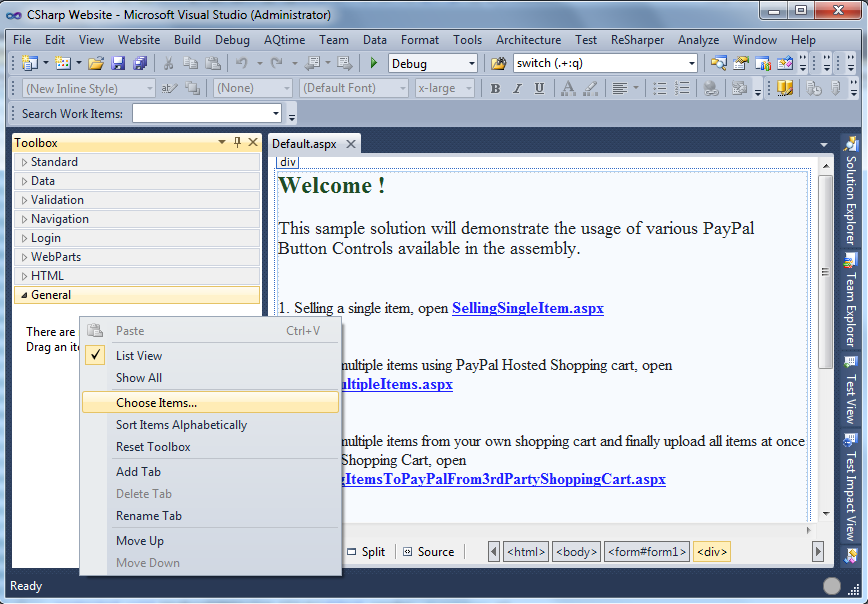
Once you selected the 'Choose Items' menu item, Choose Toolbox Items Dialog will be shown.
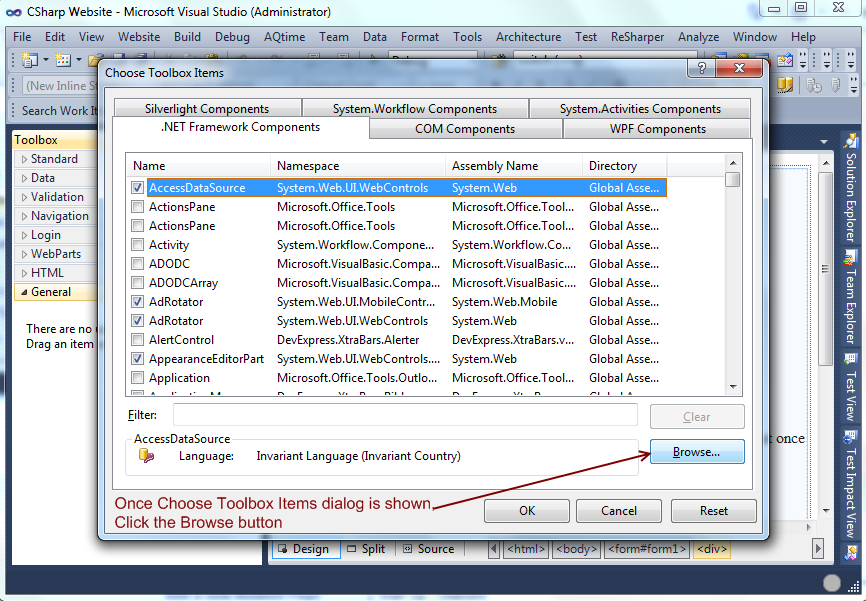
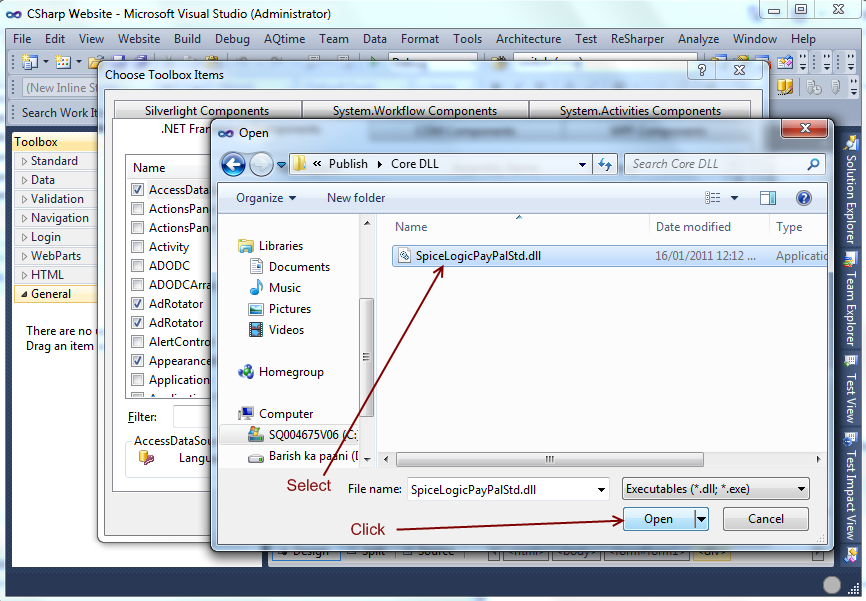
Once browse button is clicked an OpenFileDialog will be shown up, you need to navigate to the CoreDLL folder. Once CoreDLL folder is navigated, you will find the SpiceLogicPayPalStd.dll. Select that DLL and click Open Button.
Now, you will see a set of PayPal Controls selected from that Assembly. You can click the column 'Namespace' to sort by Namespace and see all the controls added from the Assembly.
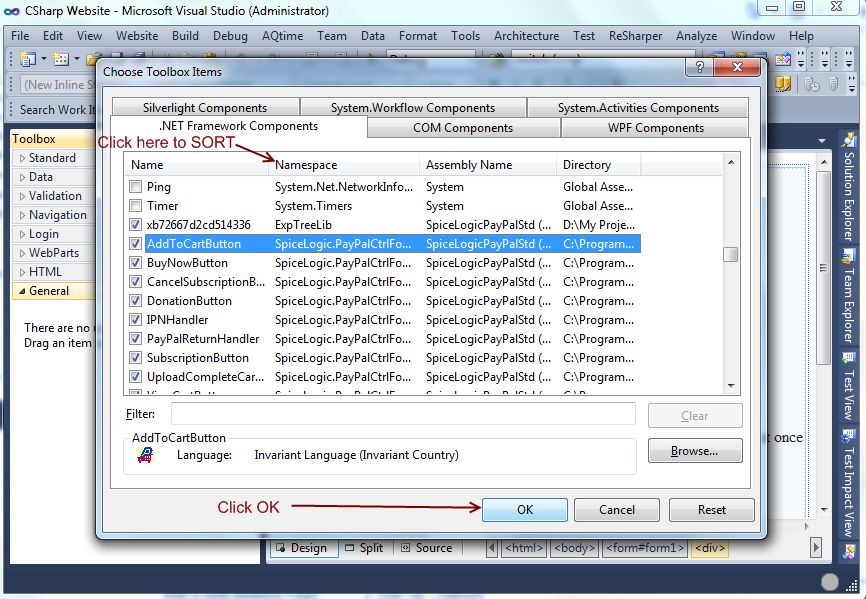
Once you clicked OK, you will see the set of PayPal controls added to your Visual Studio Toolbox.
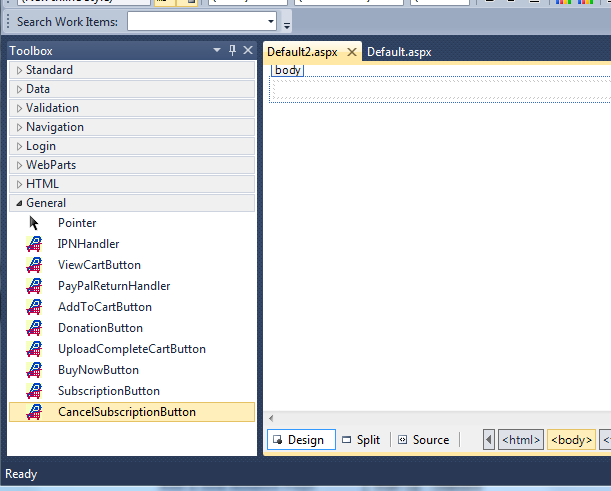
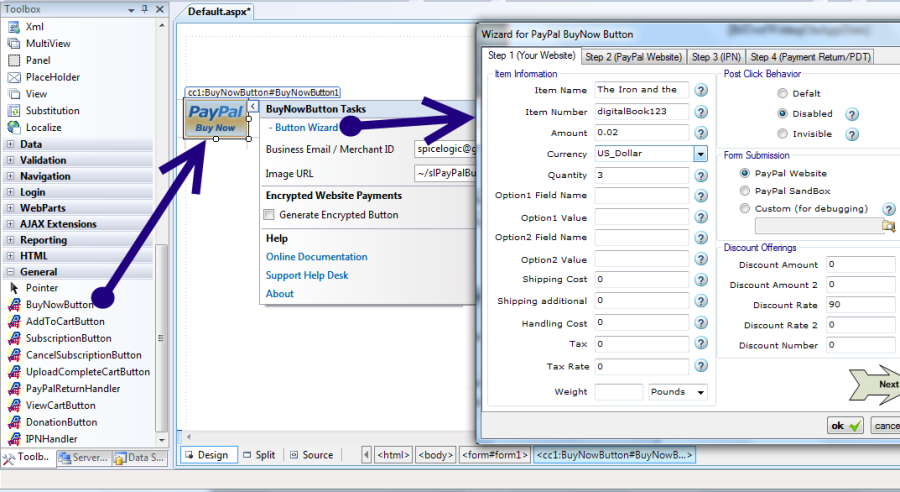
Now, you can drag and drop any PayPal control from this Toolbox to your Web page, set some properties and start collecting money from your customers.