At this point, I assume that, you generated your public certificate file (*.pem file) using the built in Certificate generation wizard. So, this chapter will help you to upload your generated public certificate file to your PayPal profile.
To upload your public certificates to PayPal:
Log in to your Business or Premier account and Click the Profile Sub tab.
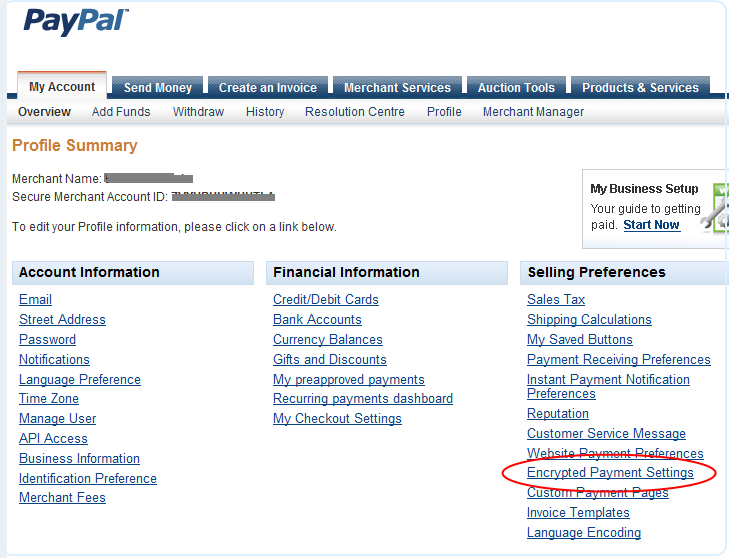
In the Seller Preferences column, click the Encrypted Payment Settings link.
PayPal account Profile Sub tab with the Seller Preferences column expanded, highlighting the 'Encrypted Payment Settings' link that opens the EWP configuration page.
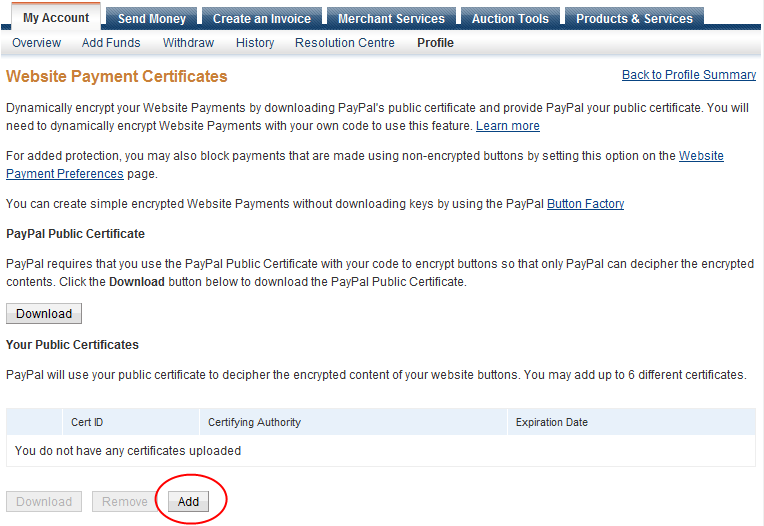
In the Encrypted Payment Setting page, scroll down the page to your Public Certificates, and click the Add button.
PayPal Encrypted Payment Settings page scrolled to the Your Public Certificates section with the Add button highlighted, used to upload your generated public certificate.
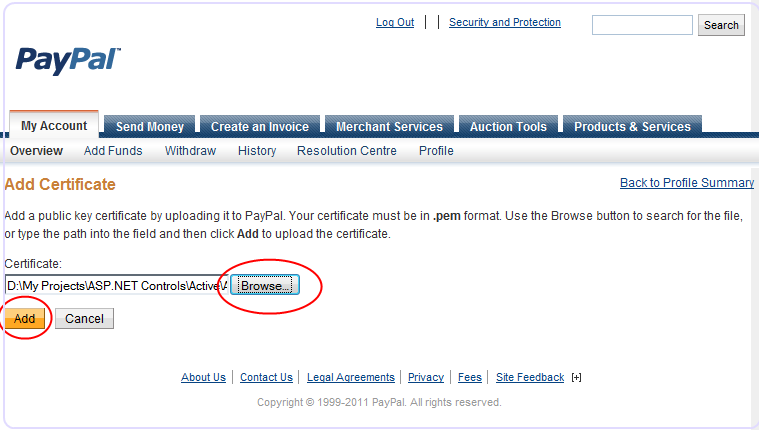
Once you clicked the Add button, a file browse box will be shown, click the browse button to locate the public certificate file you generated and stored in the App_Data folder of your Web site.
PayPal public certificate upload file browse dialog used to locate the *.pem file generated by the certificate wizard and stored in the App_Data folder.
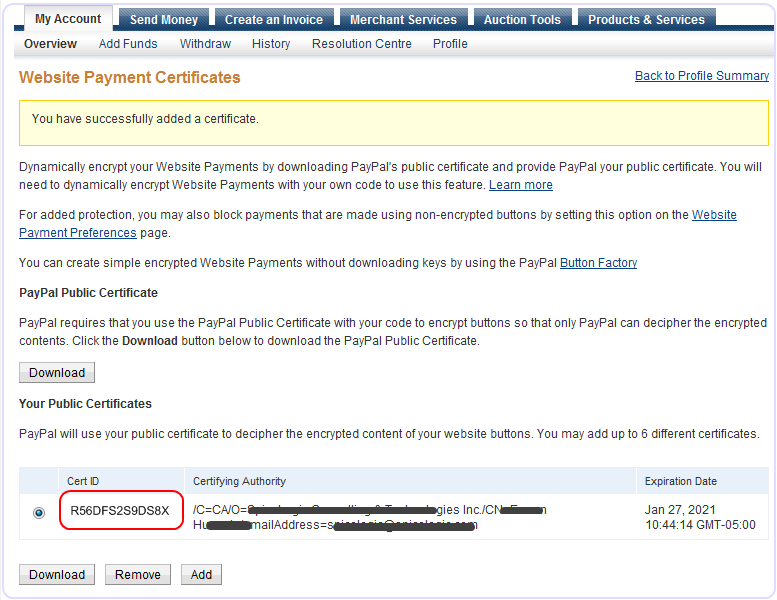
Finally, click the Add button. Once you click the Add button, your certificate ID will be generated as shown in the following screen shot.
PayPal Public Certificates list after upload showing the newly generated Certificate ID that you copy into the PayPal control's Encrypted Website Setting.
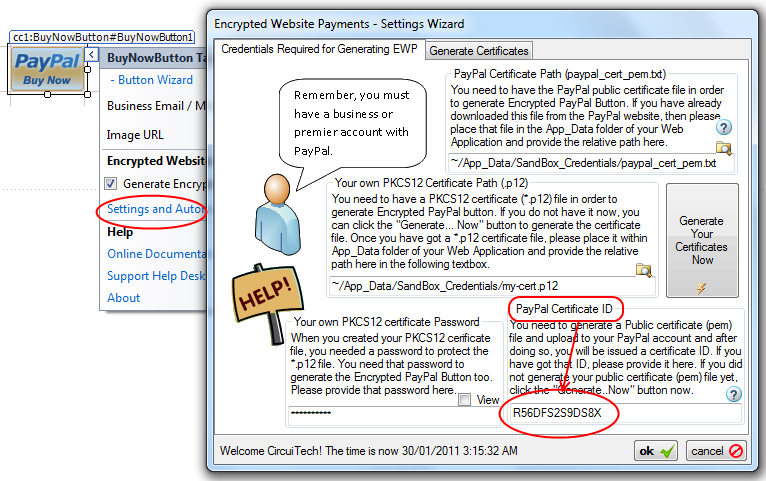
Copy that Certificate ID and set in your PayPal Control's Encrypted Website Setting Certificate ID box as shown here:
PayPal button Properties window with the Encrypted Website Setting Certificate ID field filled with the ID generated by PayPal after uploading the public certificate.